
Creating, editing, and managing your Magento 2 store pages and content is one of the most basic and necessary functions a merchant needs to know when running a Magento 2 store.
Your store’s pages are one of the first impressions that customers have with your store.
Any page on a website, and most importantly, on a Magento e-commerce site, must be appealing to your customers, informative, and simple to use.
Well-designed pages help to retain the interest of your visitors and, guide them through the purchasing process. Well-designed pages that contain informative content and meta-data information, are also a key factor in SEO and ranking higher in the SERPs (Search Engine Results Page).
In this article, we will go through the basic process of creating a new page for your Magento store, including:
- Familiarizing with the Pages Management Admin
- Creating new CMS pages
- Adding basic content on a Magento 2 CMS page
- Explore best practices for pages
Getting Familiar with the Pages Management Admin
Start by logging in to your Magento 2 administrative backend dashboard, and navigating to Content > Elements > Pages.
This will load the Pages Management screen. This page will include a list of all your currently existing pages. You can find pages that are already built on your site using the search bar or the filters function. With the filters function, you can customize the columns in your list of pages to display various information.
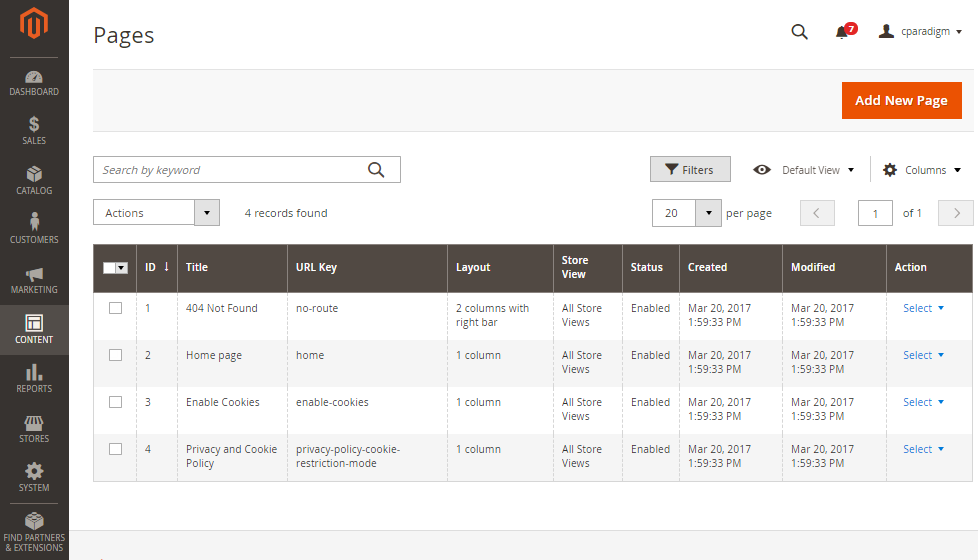
You can pick an existing page and make some quick configuration edits to it from this main table page, by clicking on the page’s line within the table.
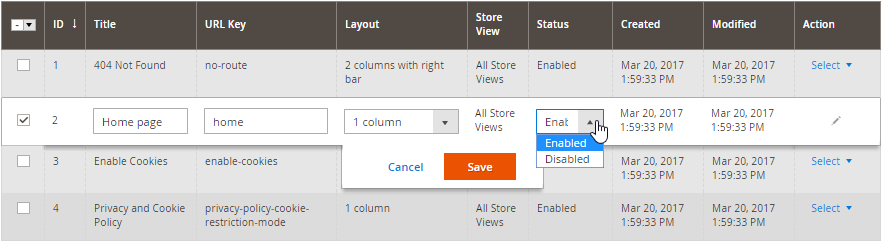
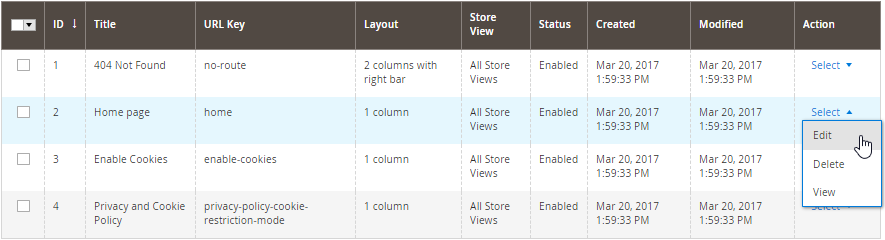
To view how a certain page looks like on your front end, or edit its title, URL, layout or active status (meaning if this page is active to show on your store), click on Select, in the Action column to activate a drop-down menu with action options for that page.
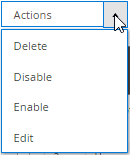
You can also perform actions on multiple pages at once by checking the box to the left on all pages you would like to make changes to, then clicking on the Actions drop down menu above the table.
Creating & Optimizing Pages
Step 1: Creating a New Page
On the Pages Management screen, click the orange Add New Page button.
Magento 2 will then load a New Page where you can add content and information.
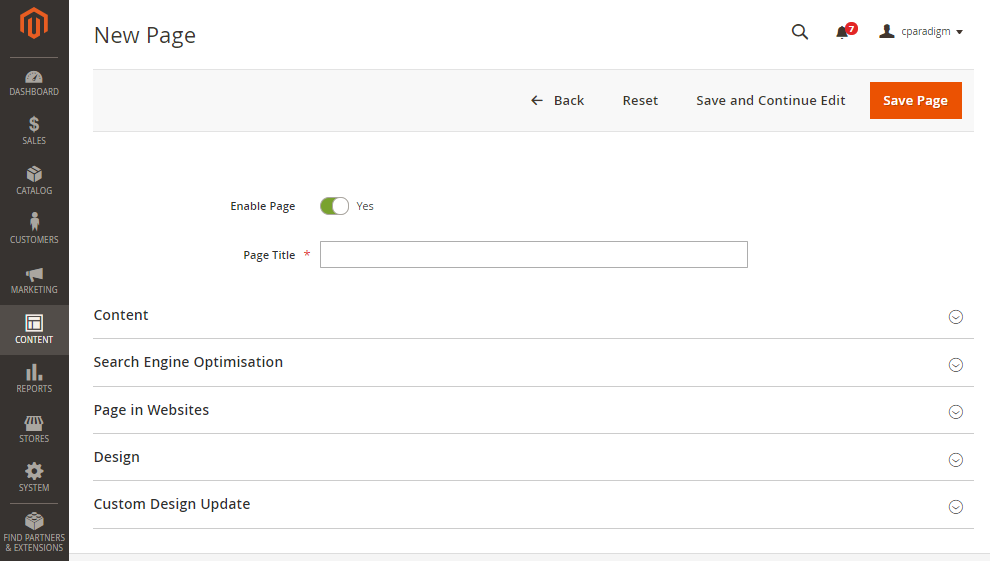
From here you can begin filling in the information for your new page. Start by creating a title for your new page (this is a required field).
Once you have entered a title for your page, expand the Content section to begin adding the content that will appear on your page. You may want to add a Content Heading, this is a text heading that will appear at the top of your new page, however, this field is not required if you do not wish to add a content heading on your page.
Under the Content Heading field, you will see the editor where all of your page content will go.
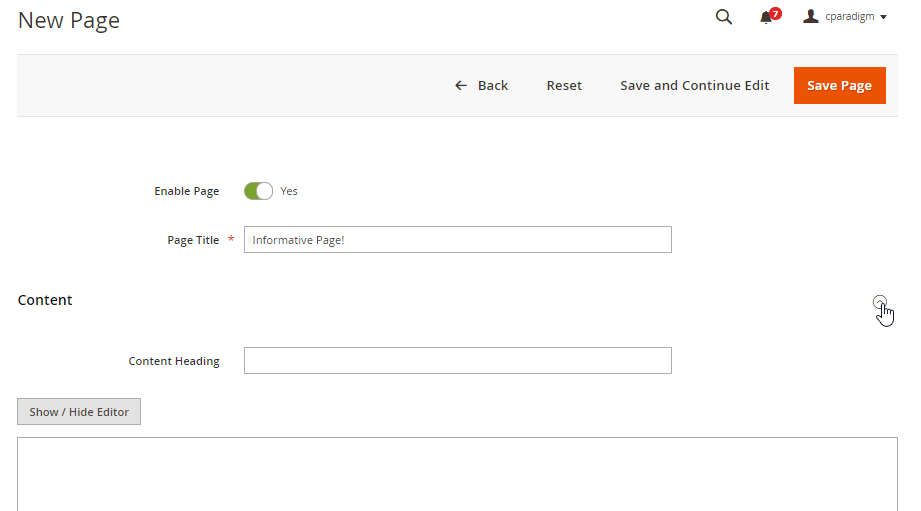
Magento 2 offers a more intuitive way to make content edits than Magento 1. Clicking the Show/Hide Editor button will toggle tools between the WYSIWYG (What You See Is What You Get), and the additional tools Magento 2 is offering.
These tools were made just for you, the merchant, so you can easily control and make edits on your own store, without the need to know any kind of code.
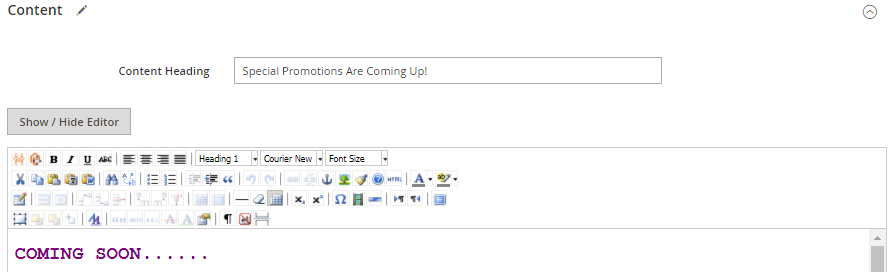
With the WYSIWYG editor active, you have access to a variety of text editing tools which allow your store to add text, tables, videos, images, links, and more.
For example, here is a simple addition of colored text to our new page through the WYSIWYG editor:
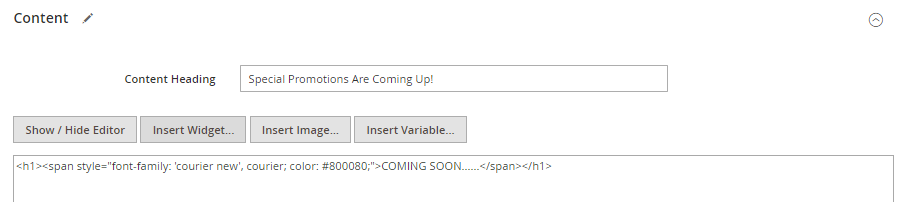
If you do not want to use the WYSIWYG editor, you have the option to use the plain text editor and add your content through standard HTML. Here is the same text from the example above in the HTML editor:
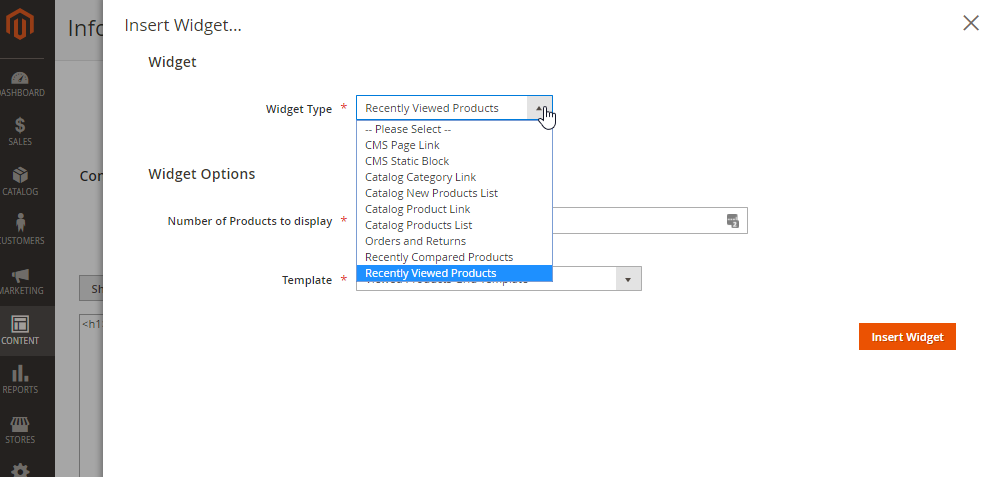
You can also choose to insert a widget. There are a wide variety of widget types to fit different situations you may want. Widgets allow you to include static or dynamic content using static blocks, order information, recently viewed products, pull feeds of product categories and more. Depending on the widget type you select there will be a variety of settings you can put in place for how that widget will act on the page.
Be sure to save your page occasionally to assure your edits are safe in case you log out or time out (want to learn more about lengthening your admin session time? Check out this quick fix!). You can save easily while staying on the same page, by clicking the Save and Continue Edit button.
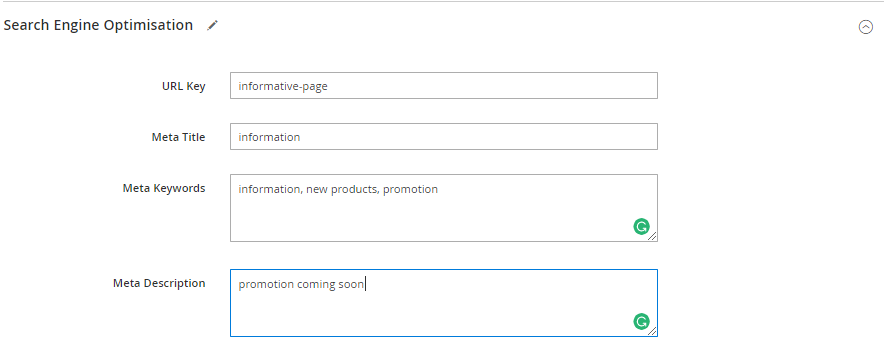
Step 2: Search Engine Optimization
When you have completed your edits under the Content tab, the next section we are going to work on is the Search Engine Optimization section.
If you’ve already saved your new page before getting to this step, the SEO tab will automatically populate a URL under the URL Key field based on that new page’s name.
Make sure this field is populated with an SEO friendly URL – a good rule of thumb here is to make sure the URL makes sense and is directly related to the page’s content (check out our guide that goes in-depth about on-page SEO for more information about formatting SEO friendly pages).
Be sure to fill in your meta title and meta description with content that accurately describes your page, this information gives search engines more information to crawl to help them place your page in the SERPs (Search Engine Results Page). Feel free to leave the meta keywords field blank if you choose, as of 2009 Google announced that it no longer takes meta keywords into account for page ranking.
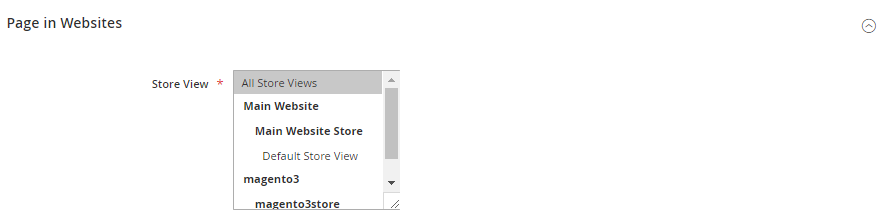
Step 3: Page in Websites
In this section, you must determine which websites and store view your new page is relevant to.
This is most relevant when there are multiple store views set up on your store. To select more than one store view or website, hold the Ctrl key (or Command key for Mac users) on your keyboard while selecting the options.
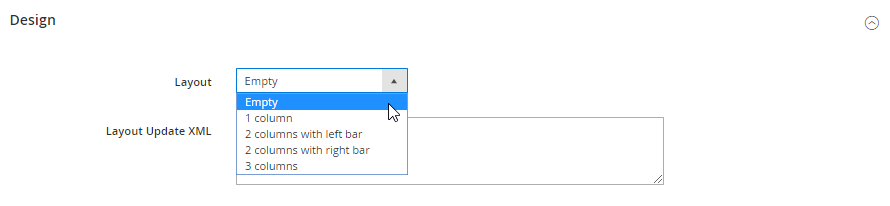
Step 4: Design
In the design section, you can change the page layout and include specific XML updates.
However, be advised – if you are using a theme, or have any theme, template or hard coded layout changes, this change may conflict with those modifications resulting in unexpected results.
You can choose various layouts with different configurations of columns and sidebars. When you have chosen your desired layout, be sure to hit “Save and Review”.
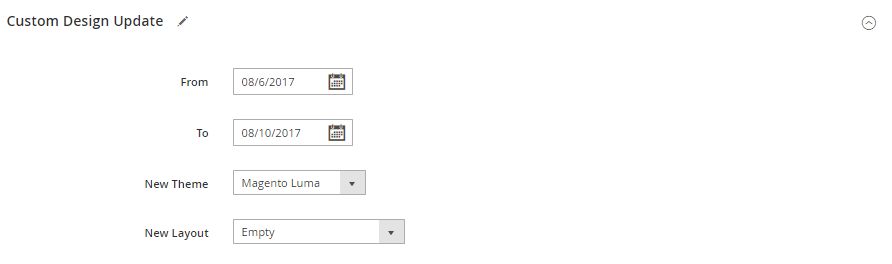
Step 5: Custom Design Update
Magento 2 offers detailed theme customization that you can apply to your site’s design per page or even per individual product page.
These changes can be set temporarily or on specific dates to allow a customized experience. For instance, you may want to set up a page or theme adjustments for a holiday or promotion. If this is something that may be relevant to your page, you can set it up here and during the set custom design dates, the page will load with the different design theme you set it up for that period of time.
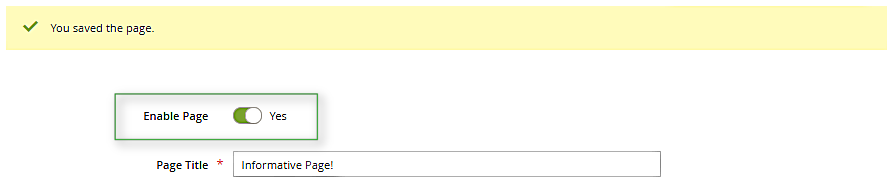
Step 6: Save and Review
Once you are done editing your page, don’t forget to save it before you log out or navigate elsewhere in your administrative dashboard.
Make sure you reviewed your new page and that you like the way it is presented to users on the front end. Once you are happy with the new page, make sure its status is set to enabled, so it is visible on the front end of your store.
Recap
You should now know how to create and add a new CMS pages on your Magento 2 store. You are now able to plan, design, and add more content that is relevant for your customer’s base to make your site as informative as possible.
Want to learn more about adding widgets, CMS blocks and other content to your pages? Be sure to check out our guides on creating pages that pull widgets and creating new CMS content blocks!
Need help creating and adding new CMS pages (and more!) on your Magento 2 store? Connect with us today and let us know how we can help you reach your e-commerce goals.