
Google Analytics is a free service provided by Google to give you almost endless possibilities for tracking different data on your Magento 2 site. For example, you can track different behaviors of users, site speed, conversions, and the list goes on. Magento 2 has a built in implementation to link your Google Analytics account with your website.
In this article we will take a look at:
- What you can do with Google Analytics
- How to get a Google Analytics tracking code
- How to set up Google Analytics on Magento 2
- How to test that your Google Analytics tracking code is active
What Can You Do With Google Analytics?
Google analytics is a tool to track and report on website traffic data. Currently Google Analytics is the most widely used website analytics tool. With Google Analytics you can track different metrics on your website that can help you identify things such as: poorly performing pages, where your visitors come from, how long they stay on your website and more. With Google Analytics eCommerce reporting you can track sales activity and other commerce related data, this is just a small adjustment in your Analytics account to enable eCommerce tracking.
Some examples of how you might use Google Analytics:
- Track your top visited pages so that you know which pages are most important to keep fresh and optimized.
- Track bounce rates on pages of your site –this tells you if a user leaves your site or a certain page without interaction or under a certain amount of time. High bounce rates can indicate an issue with the site or page. This can be a very useful metric to identify possible user experience issues with your site.
- Track your customers demographics to learn more about where your customers are located, and who they are. This can help you better reach your target audience with your marketing campaigns and content.
- Track the percentage of desktop vs. mobile visits to your site, so you know if you need to put more optimization or focus into the more widely used devices.
- Track different goals and conversions to measure the monetary success of your store.
How to Get a Google Analytics Tracking Code
A Google Analytics tracking code is a snippet of code that you get from your Google Analytics account when you set it up. It will be placed in the code of your website to link Google Analytics to your website so that it can track your website data.
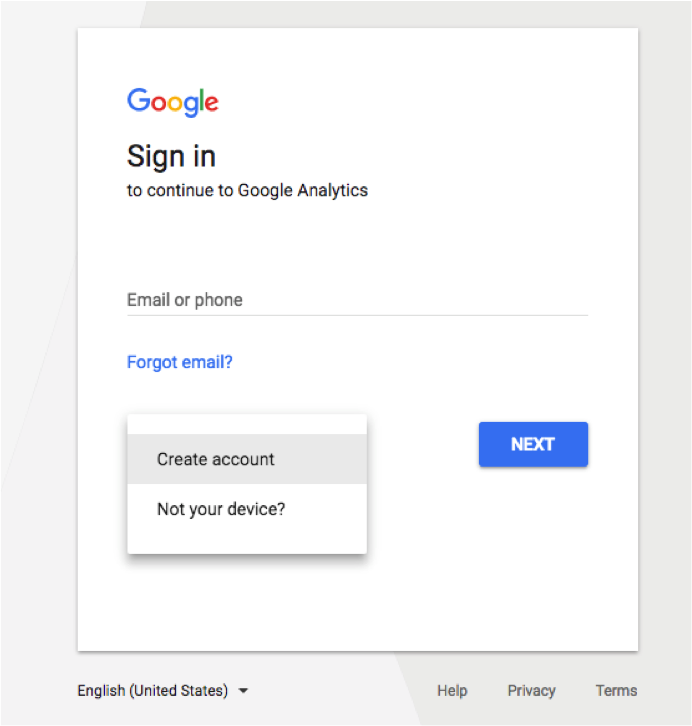
1) If you don’t already have a Google account, sign up for one for free at https://www.google.com/analytics/ It will prompt you to sign in using your Google account, if you don’t have one already for your website click Create Account
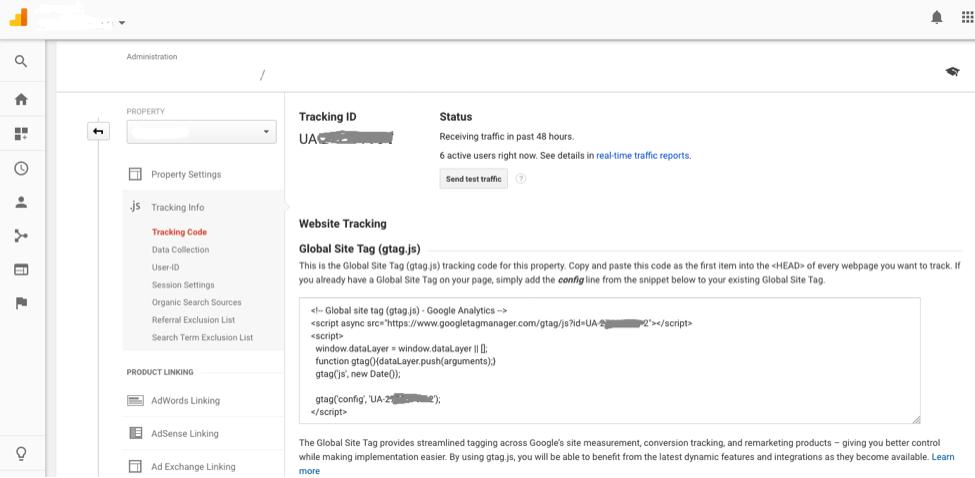
2) Log into your Google Analytics account here:
3) If you already have an account set up for your website:
- Click on the Admin tab and navigate to Accounts – click on property settings
- Tracking id
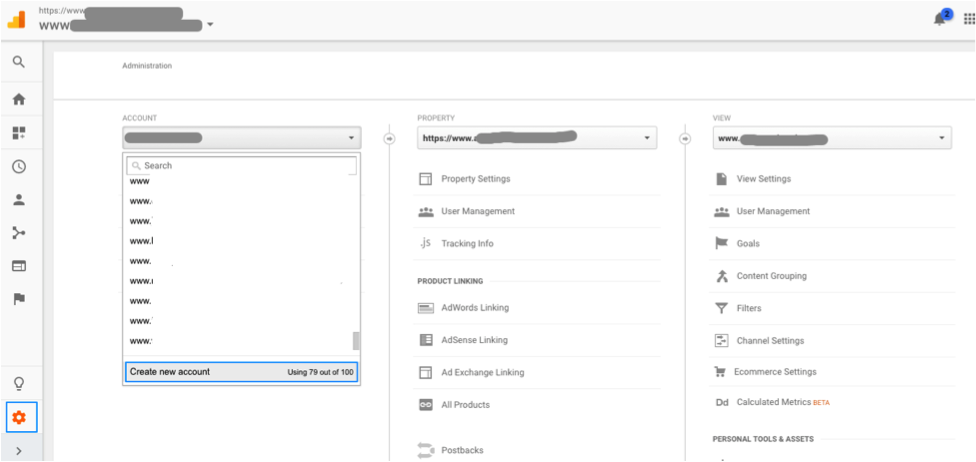
4) If you need to create a new account:
- Go to Admin and click “Create New Account”
- Fill in the required information, keep the recommended “Data sharing settings” enabled, and click the button “Get Tracking ID”
- Accept Terms of Service
5) Copy your tracking ID

Adding Google Analytics to Magento 2
1) Log into your Magento 2 Admin panel
2) Navigate to Stores > Configuration from the left-hand menu
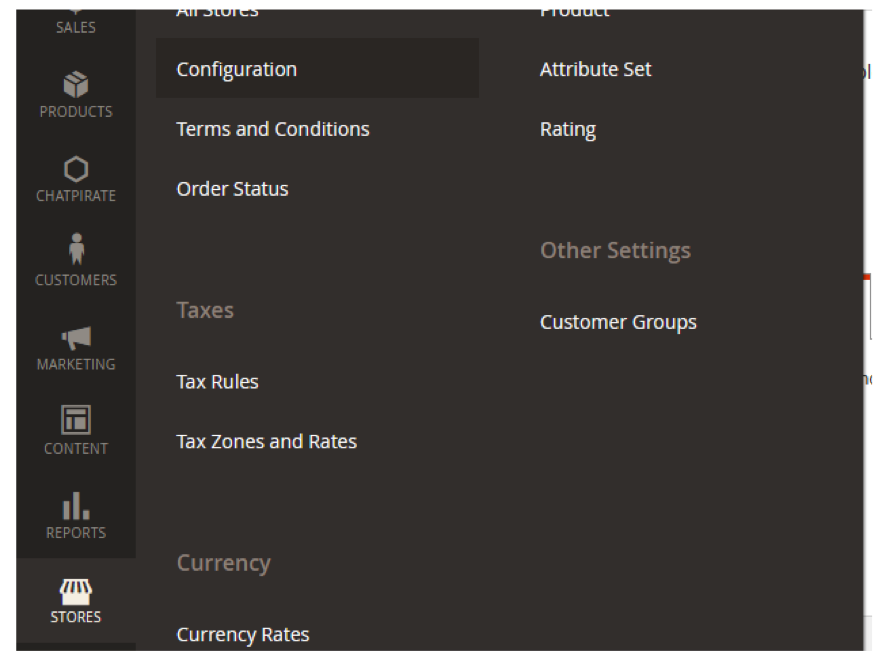
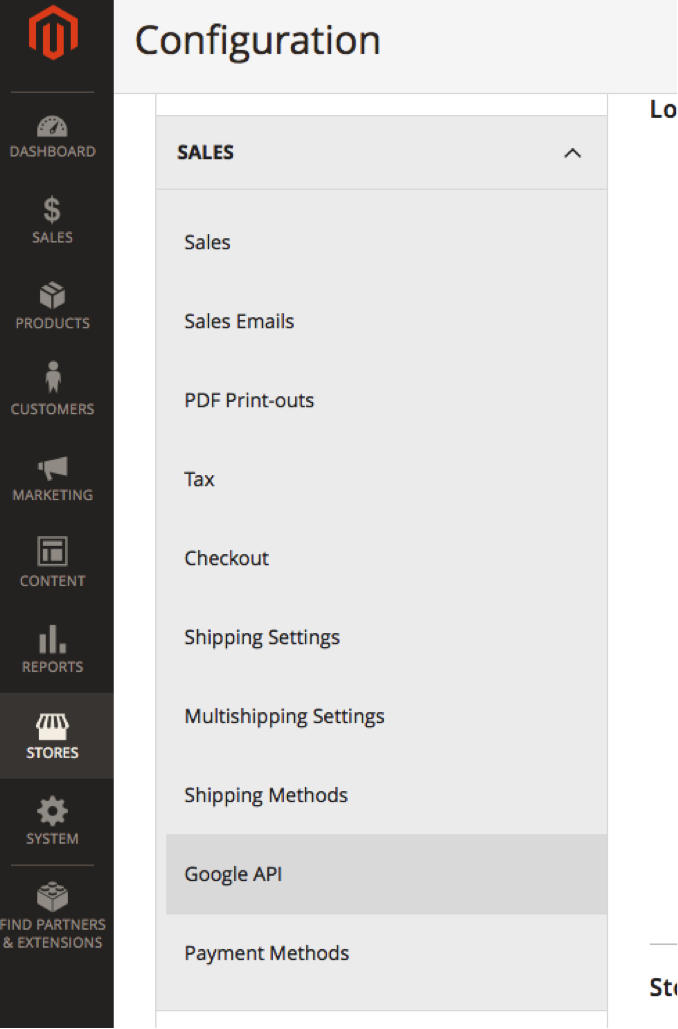
3) From the configuration screen expand the Sales section from the menu and select Google API
Note: If you have multiple Store views – make sure you are on the Store view you would like to track. You can set up a different tracking codes for your different store views if they are on different domains.
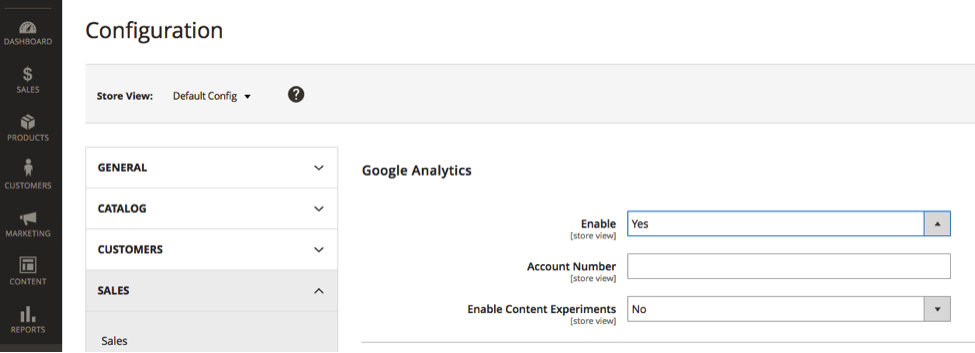
4) From the Google API screen expand the “Google Analytics” section
5) Select Enable – Yes from the dropdown menu
6) Paste in your Google Analytics account number
7) To save these changes click Save Config in the upper left-hand corner
8) After saving your changes you will need to clear your cache – you can do this easily by clicking the link in the popup message that appears after saving which will take you to the Cache Management page. Once you are on the Cache Management page – click on Flush Magento Cache. Want to learn more about cache management on your Magento 2 store? Check out our guide.
Note: We also recommend enabling the “eCommerce settings” in your Google Analytics account – all you have to do is enable it – go to “eCommerce settings” and Enable in GA. This will provide you with more tracking data relevant to Magento eCommerce websites.
Check to Make Sure Your Google Analytics Tracking Tag is Active
Now that you have your Google Analytics account connected to your Magento 2 store you will want to verify your tracking tag is working. There are a few ways that you can verify your tracking tag is active.
Method 1: Check with Google Tag Assistant
1) If you are using the Chrome browser you can install the browser extension Google Tag Assistant from the Chrome web store:

2) Once the extension is installed on your Chrome web browser visit your site and click the extensions icon to the right of your URL in the browser to record and test.
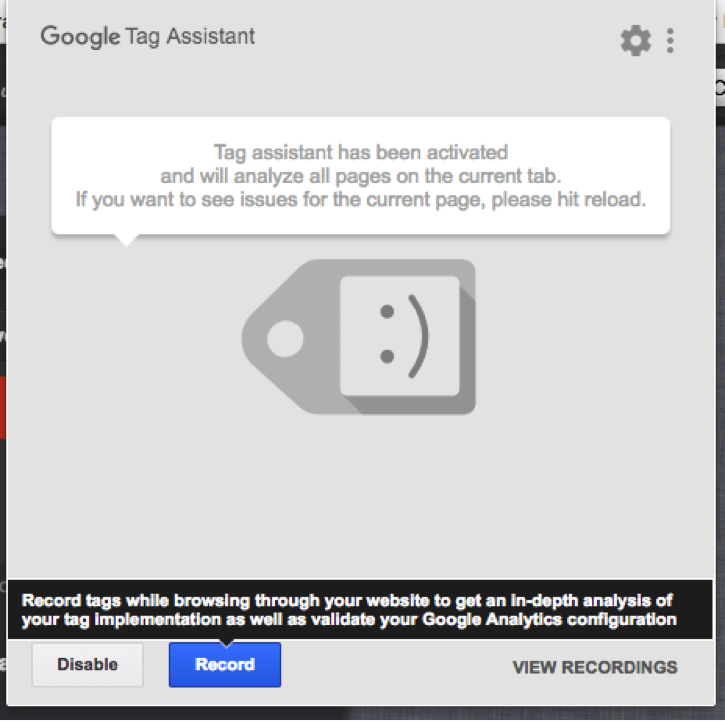
3) Once you click the Google Tag Assistant icon, it will direct you to Record a page visit to your site.
4) Click “view recordings” to see what it finds – if your Google Tracking ID is properly implemented it will show you your tracking ID in the results.
Note: This is more of a general way to check that your tracking ID has been configured and the information is being recorded in your Google Analytics account.
Method 2: View Page Source Code
1) In your Chrome or Firefox web browser, go to the front-end of your Magento 2 site and right click (or Control-Click for Mac users), and select “View Page Source” from the menu.
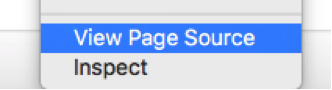
2) Click Ctrl “F”, for Windows users or Command “F” for Mac users, to bring up the find functionality or manually search the code to find your tracking ID, checking that is in place and make sure it matches the tracking ID that is found in your Google Analytics account.
Once you have completed either method 1 or 2, look at your Google Analytics account and navigate to Reporting > Real-Time > Overview. Here you will be able to see live data – such as currently active users on your site.
Closing Thoughts
Integrating Google Analytics has been made easy in Magento 2 and this is just the tip of the iceberg of what you can do with Google Analytics once you’ve got tracking set up for your Magento site.
Want to ensure that you are getting the most out of your analytics account? We’d be happy to help! Connect with us today to talk to our strategy team via phone, our website, or our newly implemented live chat. Let us help you reach your eCommerce goals.

About Leah
Leah is a Project Manager at Customer Paradigm. Leah's passion lies in email marketing, WordPress and building strong client relationships with her clients to ensure success on every project.