In this 7-part series, we will answer all of your questions about Customer Groups in Magento 2 and break down everything you need to know to create and configure customer groups on your Magento 2 store.
This is part three out of seven, we will be learning how to create a new customer group for your Magento 2 store.
New to this series? Be sure to check out:
Creating a New Customer Group in Magento 2
Creating new customer groups is quick and easy from your Magento 2 backend admin – only three simple steps.
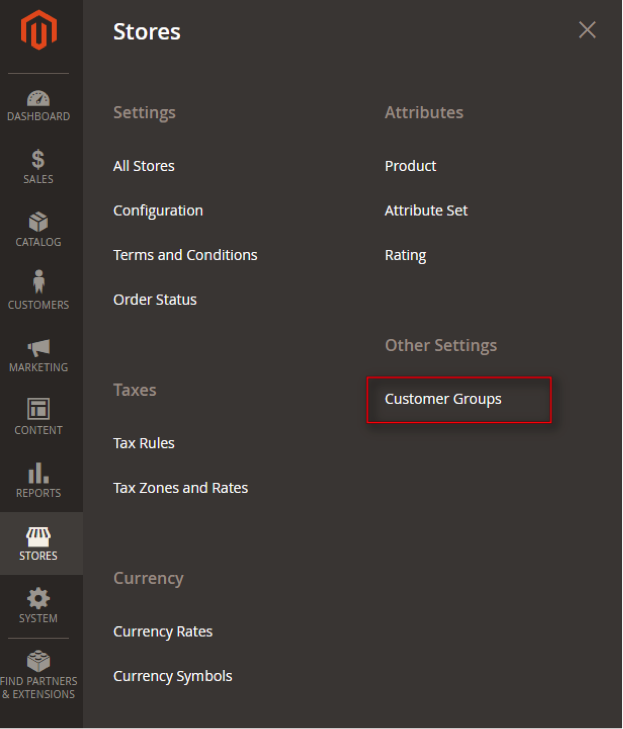
Step 1:
Navigate to Stores > Other Settings > Customer Groups:
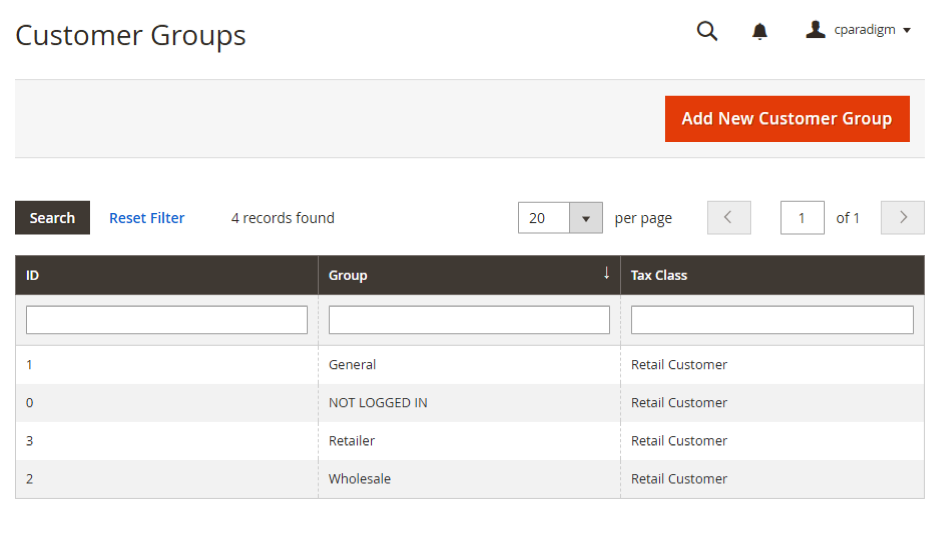
On the Customer Groups page, Magento will list of all your currently existing customer groups in a filterable table:
Step 2:
Click the orange “Add New Customer Group” button – this will bring up a New Customer Group form for you to fill out.

On the New Customer Group form, enter a new, unique group name to identify the new customer group by and then select a tax class from the dropdown to assign it to.
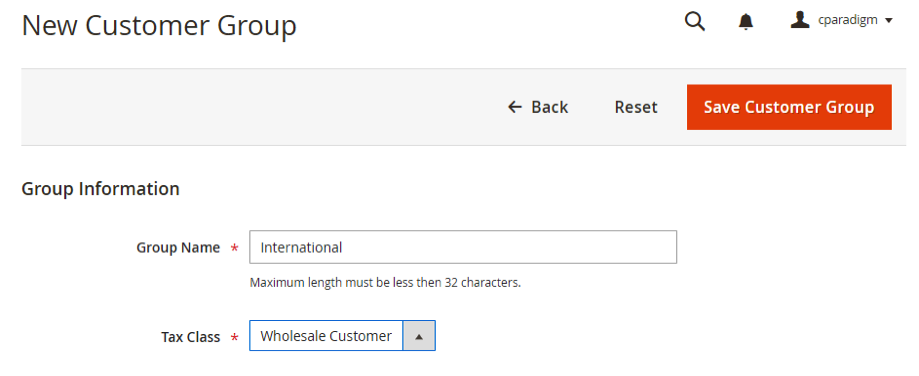
Step 3:
When you are done, be sure to save your new customer group by clicking the Save Customer Group button at the top right.

Closing Thoughts
You should now have an understanding of how to create a new customer group in Magento 2.
More questions about customer groups? Tune into the rest of the series where we cover:
- Magento 2 – Customer Group Basics
- Magento 2 – Changing the Default Customer Group Settings
- Adding Customers to a Customer Group in Magento 2
- Assigning Tax Rules to a Customer Group in Magento 2
- Assigning Promotional Rules to a Customer Group in Magento 2
- Setting Group Specific Pricing to a Customer Group in Magento 2
Are you enjoying this series on creating and configuring customer groups? Let us know your ideas for how to use customer groups on your Magento 2 store! Connect with us on Facebook or Twitter to let us know if there are any questions you have about customer groups that we didn’t answer for you.
Need help configuring, optimizing and maintaining your Magento 2 website? Connect with a member of our strategy team today and start reaching your eCommerce goals.