Whether you are migrating your site from a Magento 1.x (M1) or are completely new to Magento, you likely have a customer database you are interested in migrating to your new Magento 2 (M2) site. Since creating customers manually may become a long and tedious task, Magento allows batch creation, deletion, and editing via a simple CSV file you can easily import into your store.
In this article, we will answer some of the most frequently asked questions about importing and exporting customers with Magento 2. However, this is a wide subject, and if we missed your questions or you require further assistance, please feel free to reach out to us via email or Twitter!
Exporting Customers Out of Magento 2
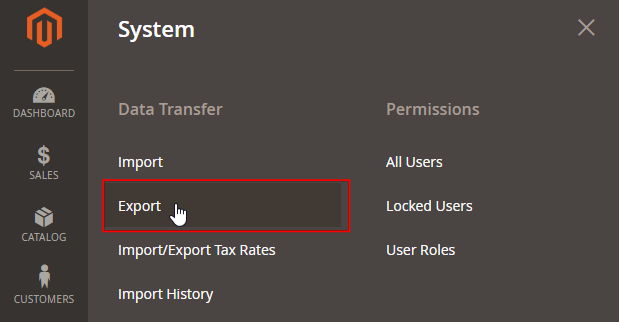
Magento 2 has the import/export functionality in a slightly different location than Magento 2. In M1 the location was in System > Import/Export, now in M2, it is under System > Data Transfer.
Step 1. Exporting
To export customers, navigate to System > Data Transfer > Export:
You will now find a short, responsive form. Under entity type select Customers Main File:
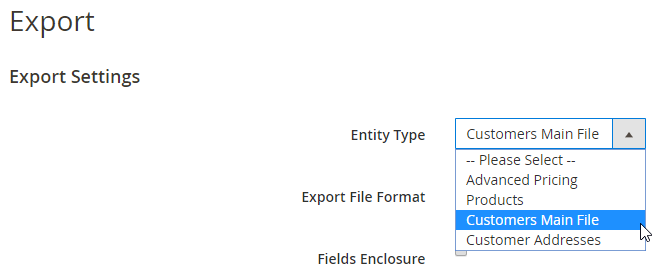
Note: Your Export File Format should always be a CSV when exporting or importing to Magento.
You will now find a new form below:
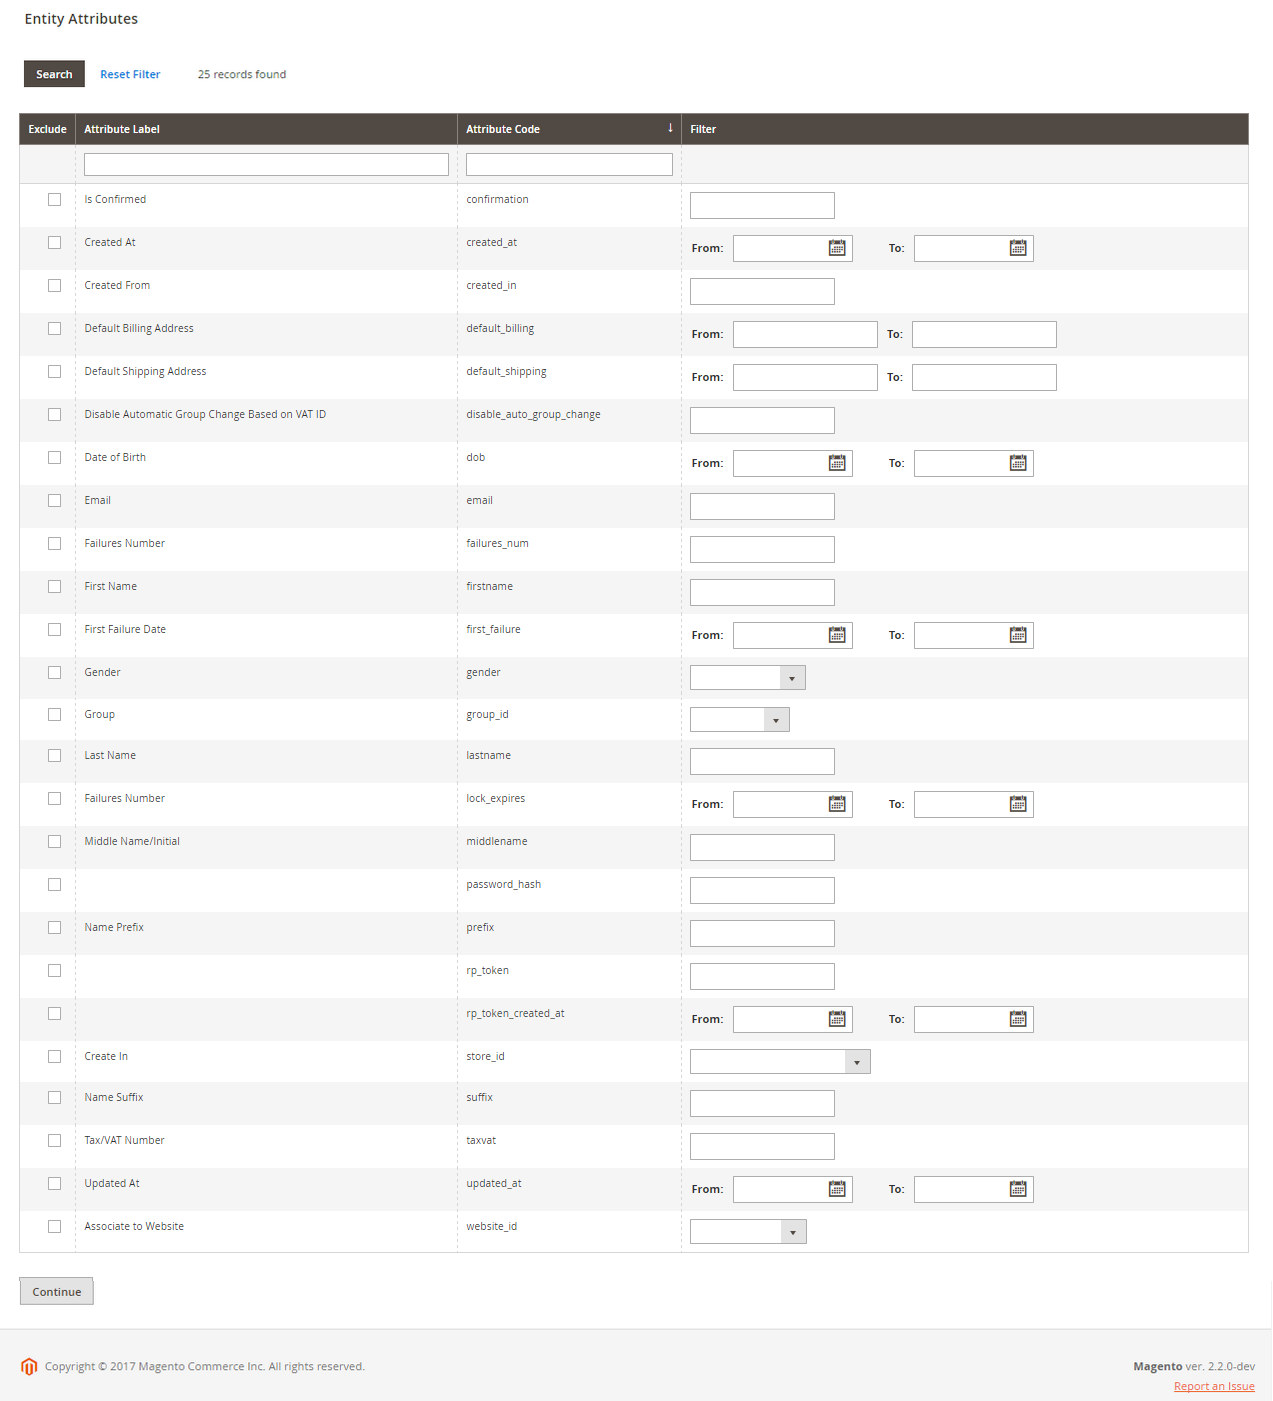
Click for larger
These are all the attributes your Magento customers are indexed by, and you can include or exclude any of them from your export, and even filter by a certain attribute value, in common with a group of customers. If we look at this table, the Attribute Code column is going to be our CSV’s column titles:
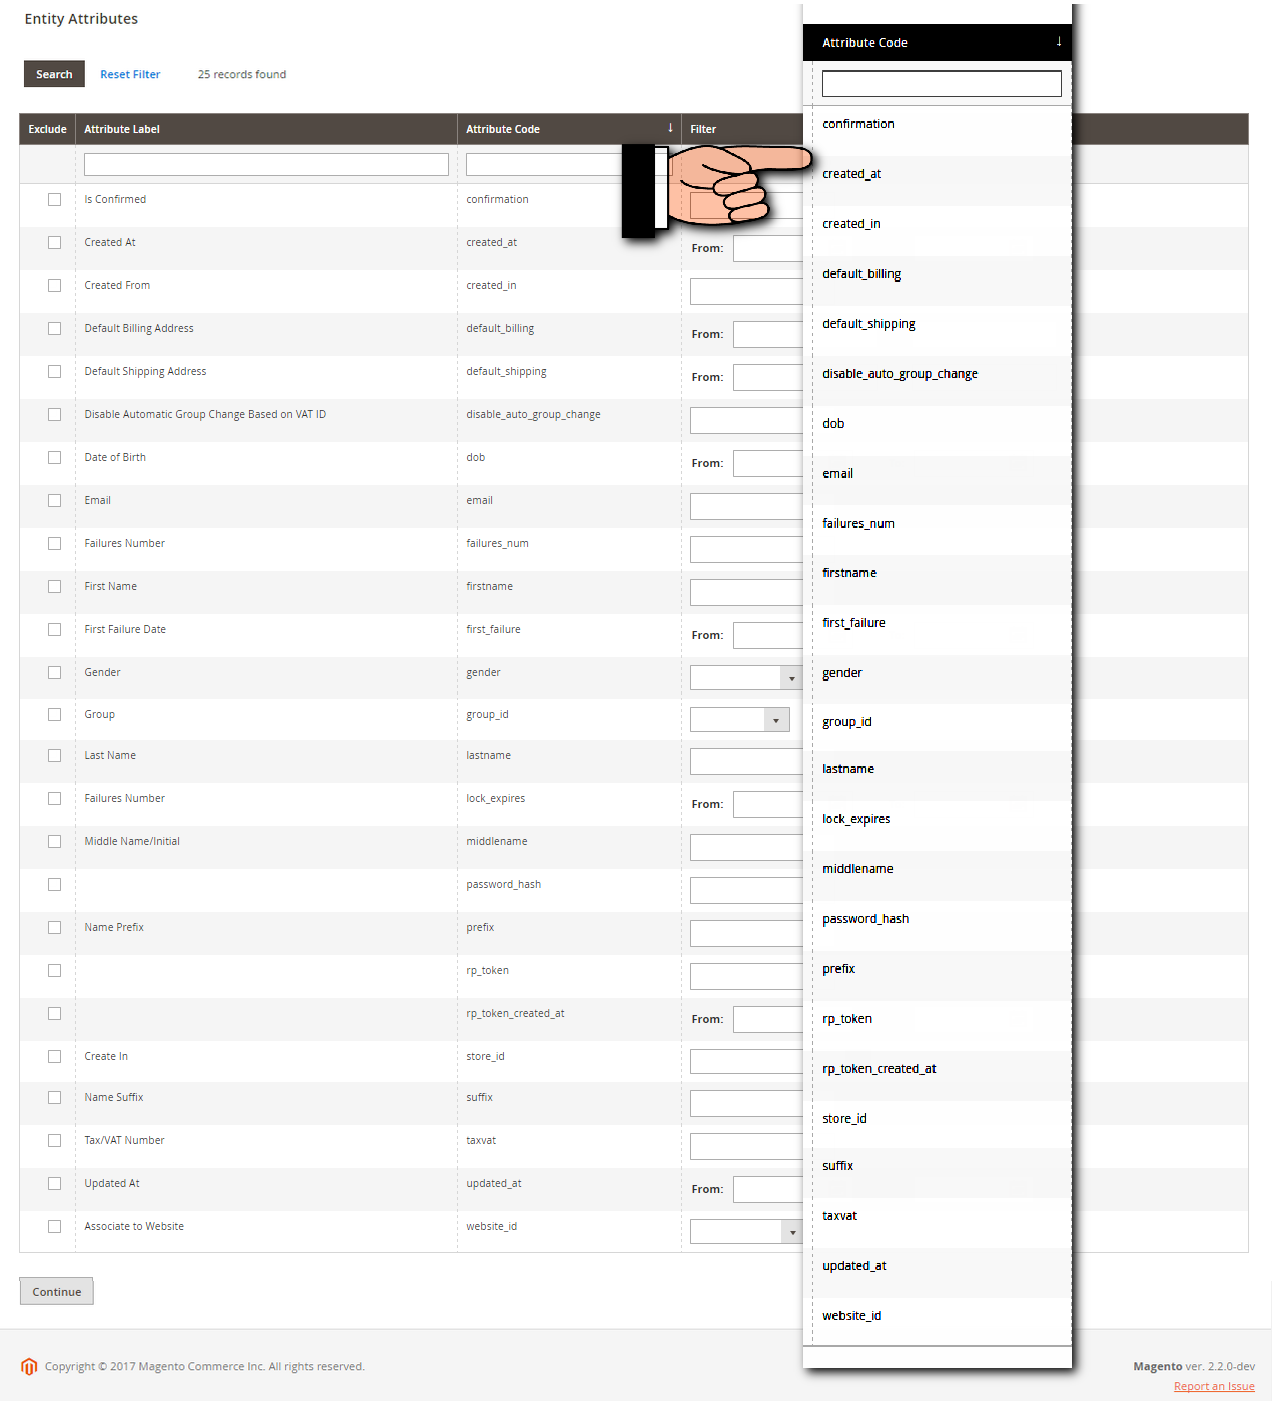
Click for larger
When you click Continue, Magento will take a moment to process, depending on the amount of information generated, usually, this takes only a few seconds.
Step 2. Opening our CSV
Once the process is done, your browser will automatically download a CSV (Comma Separated Value) file. These files are easily supported by software programs who store information in a table format like Google Sheets, Microsoft Excel, and Open Office Calc. We will talk more about these programs in “Step 4. Save CSV” section of this article.
Note: that in some cases, when your customer DB is very large, either by the number of customer records, or customer attributes, this step might take longer and at some cases, your server may time out creating an error producing this CSV file.
Open the CSV file, you will find a table of customers by the attribute codes shown above. These files can get long both vertically and horizontally once filled out, and they may become quite overwhelming at first. However, remember that each line is a customer, and not all of the attributes are necessary to change or fill in when updating or creating new customers.
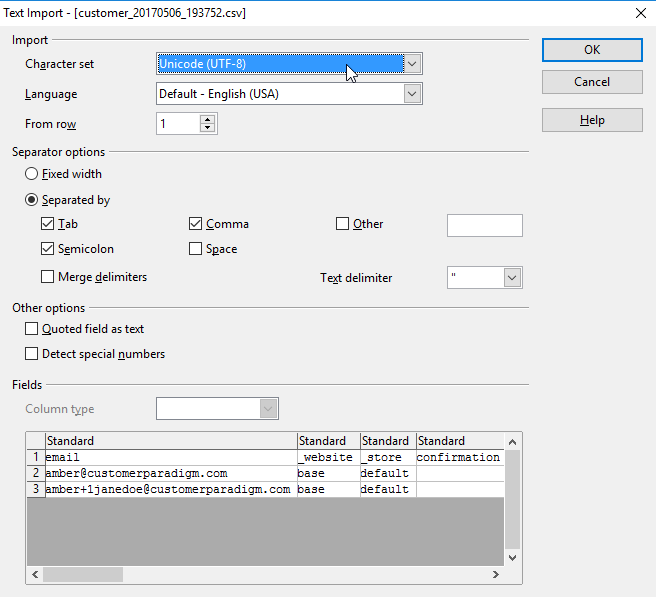
Step 3. CSV Attributes – Good to Know
Let’s get to know our table of attributes!
![]()
A. email – Your customer’s email address – This is a required field for a new customer creation
B. _website – This usually should be set to base, however, if you have a multi-website setup, this may need to change accordingly – This is a required field for a new customer creation
C. _store – This usually should be set to default, however, if you have a multi store set up, this may need to change accordingly – This is a required field for a new customer creation
D. confirmation – Some store owners require their users to verify their account upon sign up, this will be populated according to the store setup to require confirmation and the user’s click on the confirmation link in the welcome email they got. – This is not a required field for a new customer creation
E. created_at – This will show the date and time the client was created whether manually, by the user, or via a CSV import, Magento will track this point in time – This is not a required field for a new customer creation
F. created_in – This will specify whether the customer was created in the admin area or the by the user in the front end – This is not a required field for a new customer creation
G. disable_auto_group_change – Your Magento store allows you to pick a customer group your users will be automatically assigned to. Most merchants leave this group as General when some sell more to wholesale customers, they sometimes use this functionality and change it to the Wholesale customer group. The value of this attribute changes between 0 for No, and 1 for Yes. – This is not a required field for a new customer creation
H. dob – Date of Birth – This is not a required field for a new customer creation
I. firstname – This is a required field for a new customer creation
J. gender – This is not a required field for a new customer creation
K. group_id – a number value – Usually 1 for General, 2 for Wholesale, 3 for Retail – This is not a required field for a new customer creation
L. lastname – This is a required field for a new customer creation
M. middlename – This is not a required field for a new customer creation
![]()
N. password_hash – Magento 2 has changed the password hash method from MD5 which was used in Magento1 to SHA 256, Magento 2 still supports the MD5 encryption method, however, if you are not using an integration tool to import your customers, they might have to reset their password on their next login to your store. There are modules today that may help with this issue and allow you to import your customers with both methods so they could keep their passwords. – This is not a required field for a new customer creation
O. prefix – This is not a required field for a new customer creation
P. rp_token – This is not a required field for a new customer creation
Q. rp_token_created_at – This is not a required field for a new customer creation
R. store_id – This is not a required field for a new customer creation
S. suffix – This is not a required field for a new customer creation
T. taxvat – This is not a required field for a new customer creation
U. website_id – This is not a required field for a new customer creation
V. password – This is not a required field for a new customer creation, however, you could set it up for them if needed.
W. address_city – This is not a required field for a new customer creation
X. _address_company – This is not a required field for a new customer creation
![]()
Y. _address_country_id – This is not a required field for a new customer creation
Z. _address_fax – This is not a required field for a new customer creation
AA. _address_firstname – This is not a required field for a new customer creation
AB._address_lastname – This is not a required field for a new customer creation
AC._address_midlename – This is not a required field for a new customer creation
AD._address_postcode – This is not a required field for a new customer creation
AE._address_prefix – This is not a required field for a new customer creation
AF._address_region – This is not a required field for a new customer creation
AG._address_street – This is not a required field for a new customer creation
AH._address_suffix – This is not a required field for a new customer creation

AI._address_telephone – This is not a required field for a new customer creation
AJ._address_vat_id – This is not a required field for a new customer creation
AK._address_default_billing_ – This determines the address functionality, a customer may have a limitless number of billing addresses, each additional address will follow the customer’s line on the CSV with its own line. Here, 1 stands for “yes” this will be the default address for billing, 0 stands for “no” – This is not a required field for a new customer creation
AL._address_default_shipping_ – This determines the address functionality, a customer may have a limitless number of shipping addresses, each additional address will follow the customer’s line on the CSV with its own line. Here, 1 stands for “yes” this will be the default address for billing, 0 stands for “no” – This is not a required field for a new customer creation
Note – you don’t have to have all the fields in your CSV to be able to import it back to Magento2. However, make sure to always have the required fields.
Step 4. Save CSV
When done with your edits to the CSV file, make sure you use the Save As functionality, to ensure you do keep your table in a CSV format.
Most people use Microsoft office’s Excel program to open and manage the Magento CSV files out of habit; which is good, however, Excel is known to add hidden characters to CSV files and as a result, can create numerous errors once trying to import back into Magento. To avoid this, when saving, click on Save As and make sure you use the “.csv” file extension. If you are still having issues with your import file, copy and paste the whole table into a new and clean spreadsheet (be careful not to miss anything, these spreadsheets can get quite long). Excel sometimes throws this error to alert you to possible data loss which may mean that additional data has been added (See Image 4.1).
Image 4.1:
![]()
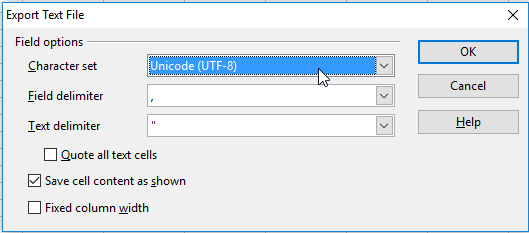
If you are using Open Office, it will ensure you stay on the CSV file format without unusual errors, as it allows you to confirm your file uses Unicode UTF-8, which is best for Magento import/exports. See Image 4.2 for examples of Open Office opening a CSV and Image 4.3 for saving one.
Image 4.2:
Click for larger
Image 4.3:
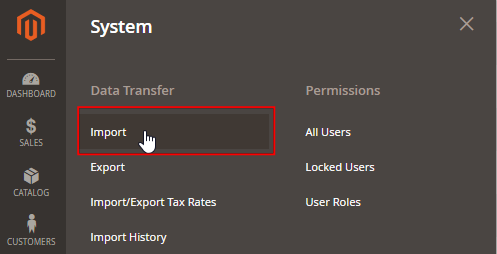
Step 5. Import CSV
To import customers, go to System > Import:
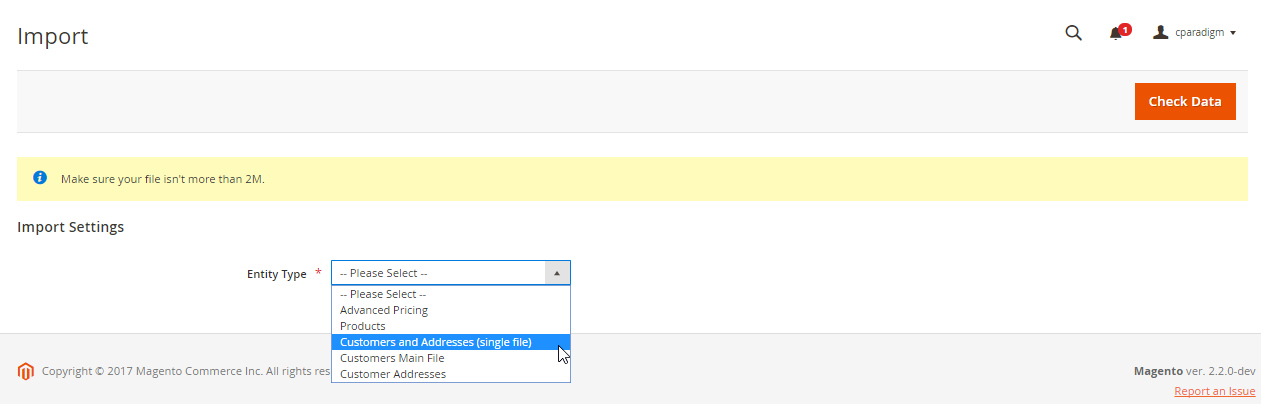
You will now find a form where you are first asked to define for Magento what entities are being imported. You will notice that there now 3 different possible Entity Types to import your customers:
- Customers and Addresses (Single File) – This will allow you to import CSV’s that cater for all your customer’s information, and would update both customers and addresses attributes.
- Customer Main File – Will import CSV’s that only cater to the customer attributes, addresses attributes are not necessary to be included on this CSV
- Customer Addresses – Will import only customer addresses attributes
Read more about Customer Attribute Reference and the relevant attribute structure for these Entity Types in this short Magento guide (This does not denote which attributes are required).
Otherwise, you can pick the Customer Main File and continue to define the import behavior and upload your CSV file:
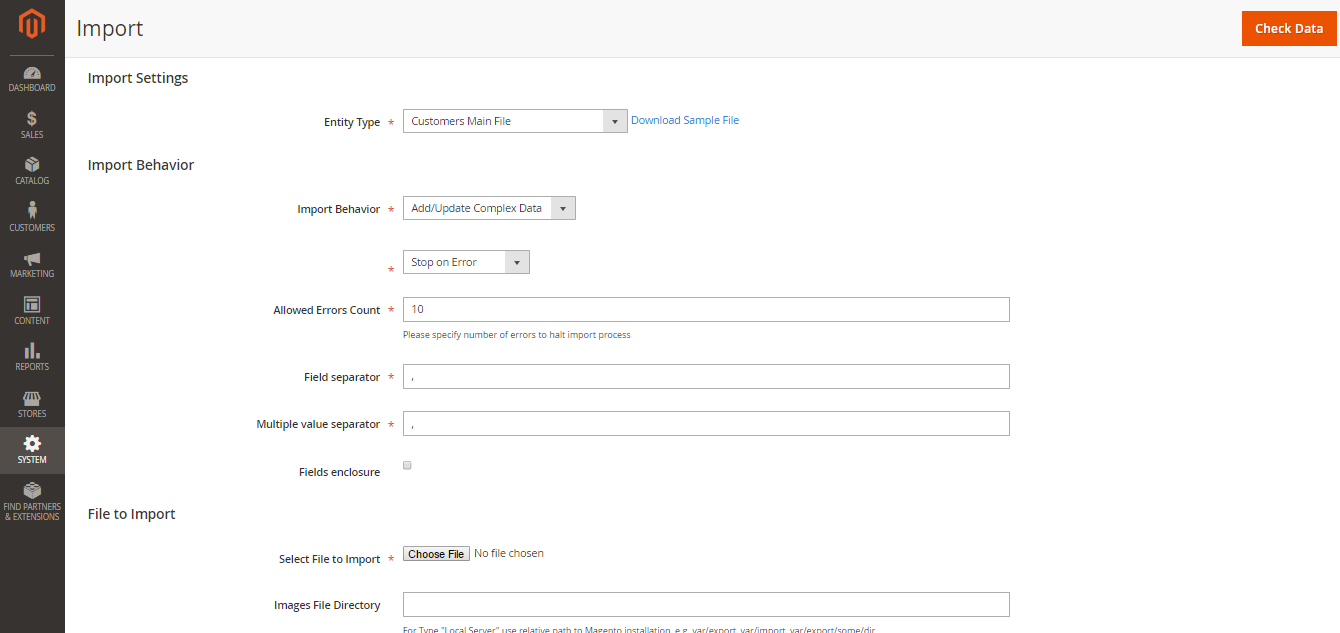
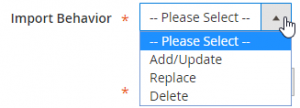 Import Behavior – If you are creating new customers or migrating them from a different store, the Import Behavior should be set to Add/Update Complex Data. You can also use the Import tool to replace records, which will remove the current existing customers and recreate them with the current information you are importing; or delete records, careful to not remove customers by mistake, as deleting customers (and/or products) using a CSV, requires much less attributes to be included in your CSV, therefore, once uploading, M2 scans fewer attributes on that CSV. This means that if you did make a mistake and deleted some customers, you may want to re-import those using the same CSV. However, to create new customers Magento will verify all the required attributes, so you may now have some errors or missing details in your CSV. You can also skip or stop on errors, for when Magento checks your data. If you set it to “Stop on Errors”, M2 will start scanning your CSV, and stop at the first error, letting you know the error it found so you can adjust your CSV file to fix it and re-import. When set to “Skip Error Entities”, M2 will scan up to 100 errors (or less if you specified so in the “Allowed Error Count” field).
Allowed Errors Count – Allows you to define the number of errors Magento would report before stopping the scan, Magento by default stops after the first 100 errors. Once Magento hits that number of errors, it will specify where and what they are, allowing you to download an error report CSV for the entities and attributes it found. Remember – Magento always counts up from 0 – i.e. if the error is specified to be in rows 1 and 2, you should look at rows 2 and 3, keeping in mind that what Magento would consider row 0 in this case, will be the attributes (or fields) represented in your file.
Field Separator and Multiple Value Separator – Some people like to change their separators from comma to a pipeline (|), or some other character. If you do, make sure you change that both when you import (in the above screenshot), and in your actual CSV file (may be called field delimiters or separators).
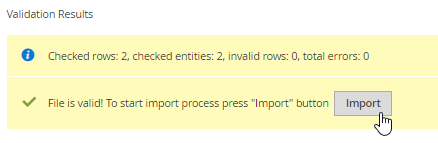
Image File Directory – If you have images included in your CSV file, make sure you noted their path correctly according to the path for your media folder in your Magento instance (usually “/pub/media/import” is the folder to upload images to and then specify in this field. Now you can Choose your file to Import and click on Check Data. If your CSV file is valid but with errors, Magento will let you know (See image 5.1) and you will have to go and correct them. Keep in mind that Magento starts to count your CSV rows after the first (i.e. row 1 in the validation results = row 2 in your CSV). If your CSV is correct Magento will let you know as well and you will be able to Import (See Image 5.2).
Image 5.1:
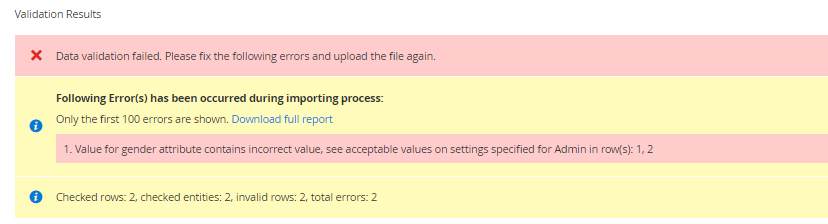
Image 5.2:
Step 6: Verify
Once you click on the “Import” button, Magento will take a moment to process, and will let you know with the following message:
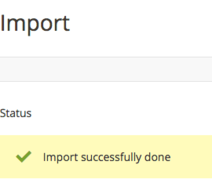
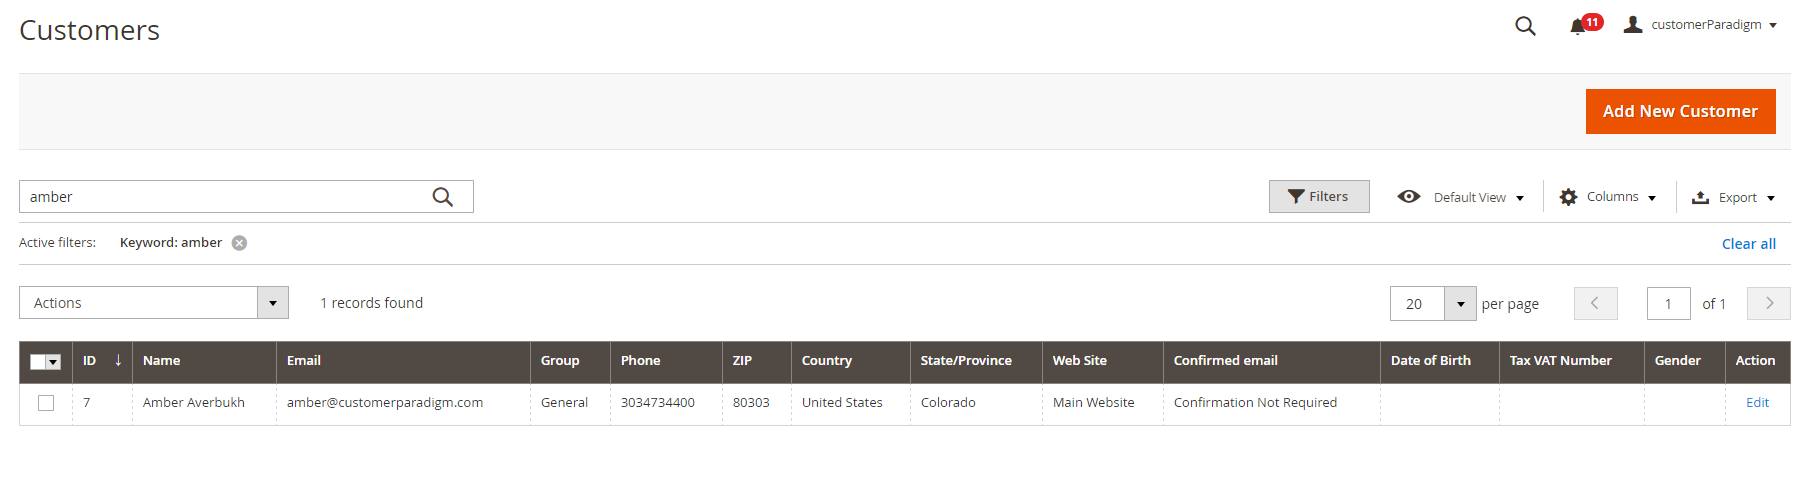
Since you imported customers and no products, there is not a lot to test, but you can still go to verify your changes by clicking on Customers > All Customers and using the search box or filters to find your new and/or edited customers to confirm your customers are indeed successfully updated.
Click for larger
Closing Thoughts
You should now know how to import, edit and export customers to and within Magento 2. If you are familiar with Magento 1, you may find that not a lot has changed in this aspect other than the password hash method; the possibility to separate your customer import files from processing all, or some of the information of your customers; creating or updating their information, and even just getting to know your customer base better for marketing purposes. Magento 2 does allow for some more detailed and developed customer import and export using Dataflow import/export but that is another subject article.
Customer Paradigm specializes in finding the right solutions for your business. Contact us to talk to a real person for database architecture, site planning, and more! Let us know how we can help you be successful!