The User Roles functionality in Magento 2 allows store owners to define permissions for specific groups of admin users depending on their store’s needs.
By default, Magento 2 creates the Administrators role with full permissions. Most stores running Magento 2 have users who should not have access to every section within the admin panel. For example, Most store owners don’t want Customer Service and Sales Representatives to wander into the Advanced portion of the Configuration where they can easily disable vital system modules. Therefore, you should create Roles for groups of users like this with specific permissions pertaining to their responsibilities.
Not only does this protect your store from accidental configuration mishaps, it also helps users learn their role in the Magento admin faster since they don’t have to search through all of the menu options looking for the one they need- you can reduce the number of menu links from 80+ down to 3 or 4 depending on the role.
How to Create a New Admin Role in Magento 2.0
For this demonstration, we will create a standard Role for Customer Service Representatives and restrict their access to only what they need to keep customers happy. (Note: While you are setting configurations in your Magento 2 store you may find it helpful to lengthen the time of your admin user session.)
Step 1.
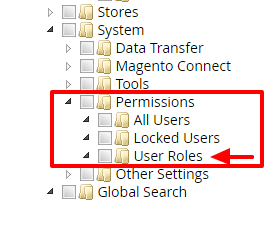
To create a new User Role, Navigate to System-> Permissions -> User Roles and click Add New Role

Step 2.
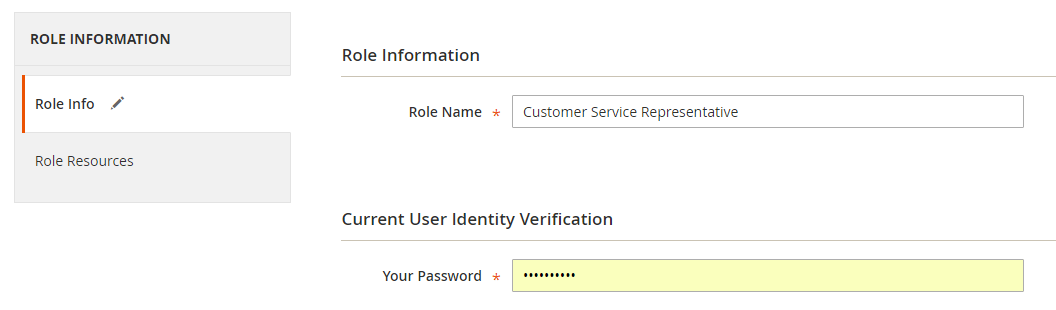
Give your new Role a name in the Role Info tab. This name is for internal purposes only but should describe the Role’s responsibilities as it can be easy to forget which roles are responsible for which functions when there are many roles on your site. For this example we will name our role Customer Service Representatives. In order to create a new role you must also enter the current user’s password.
Step 3.
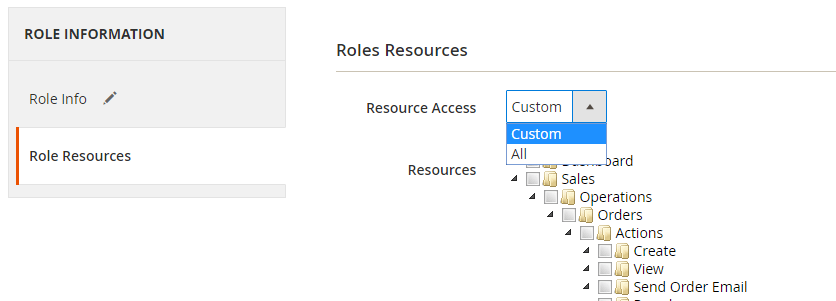
Next you will define the permissions granted to users with this Role under the Role Resources tab. You have two options:
- All– will grant users with that Role access to every segment in the Dashboard (same level of permission as Administrators)
- Custom– allows you to select which segments of the Dashboard users with that role can or cannot access
For the Customer Service Representative role we are creating we only want to grant access to specific areas of the Dashboard, so we will select Custom.
Step 4.
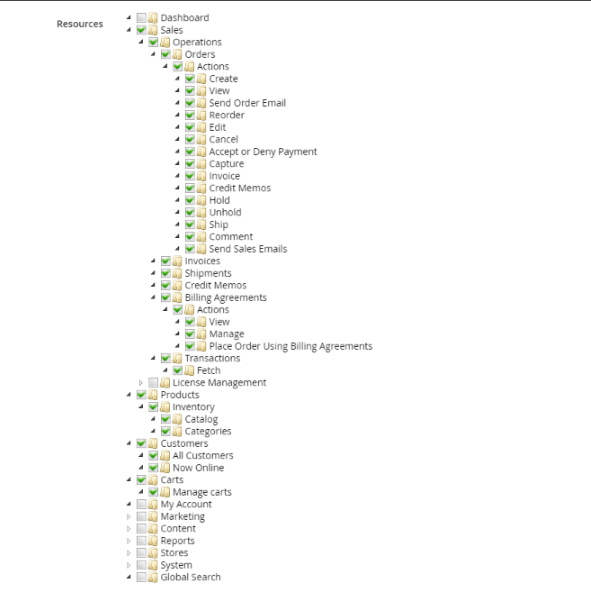
In general, users in Customer Service will need access to these portions of the admin in their day-to-day interactions with customers:
- Sales
- Invoices
- Shipments
- Credit Memos
- Billing Agreements
- Transactions
- Products
- Customers
- Carts
When you check the box for each of these sections all associated sub-sections will be selected. Any sub-section can be unchecked to deny access to that segment of the admin.
If you aren’t sure which resources to assign to a user’s role you can often look to the Magento 2 sidebar menu for guidance. All Magento menu items are listed as high-level resources (Sales, Products, Customers, Marketing, etc.)- start with these resources and work your way down to the specific portion of the admin you want to grant access to.

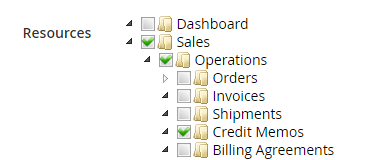
In the Customer Service Representative example, say we wanted to grant access to the Credit Memos Magento segment. Looking in the menu we see Credit Memos listed under Sales > Operations. On the resources page if we look under Sales > Operations we see Credit Memos as an option. The Magento menu is a good general reference when determining resources to allocate but when in doubt you can always check or uncheck an option, save the role, and login as a user assigned to that role to see if you have targeted the right segment.
*Note: Any time you add an extension or a custom-developed module, new resources appear in the Roles Resources tab unselected by default for all user groups with Resource Access set to Custom. Keep this in mind in case you add an extension and can’t figure out why some of your admins can’t see the proper segments in the admin- you need to manually grant access to new segments!
Step 5.
Once your permissions have been selected click Save Role.
Step 6.
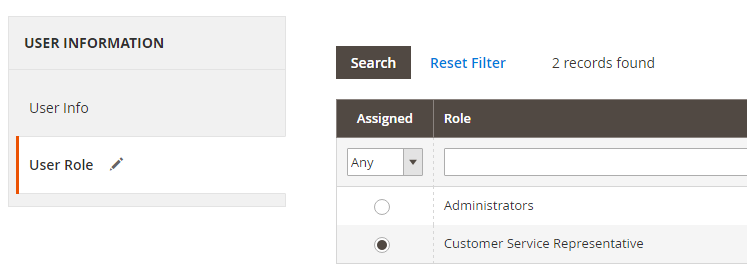
When the page refreshes you will see a new tab- Role Users. This tab lists all users currently assigned to that role. To add new users to a role, simply check the box by their name and save the role. Once the role is created you will also be able to assign users to that role from either the user creation or user edit screens.
Once an Admin Role has been created the Role Resources can always be modified afterwards to add or remove access to any portion of the Dashboard. We always recommend creating a test user under new roles and verifying that users assigned to the role have access to all segments they require, and do not have access to any segments they shouldn’t.
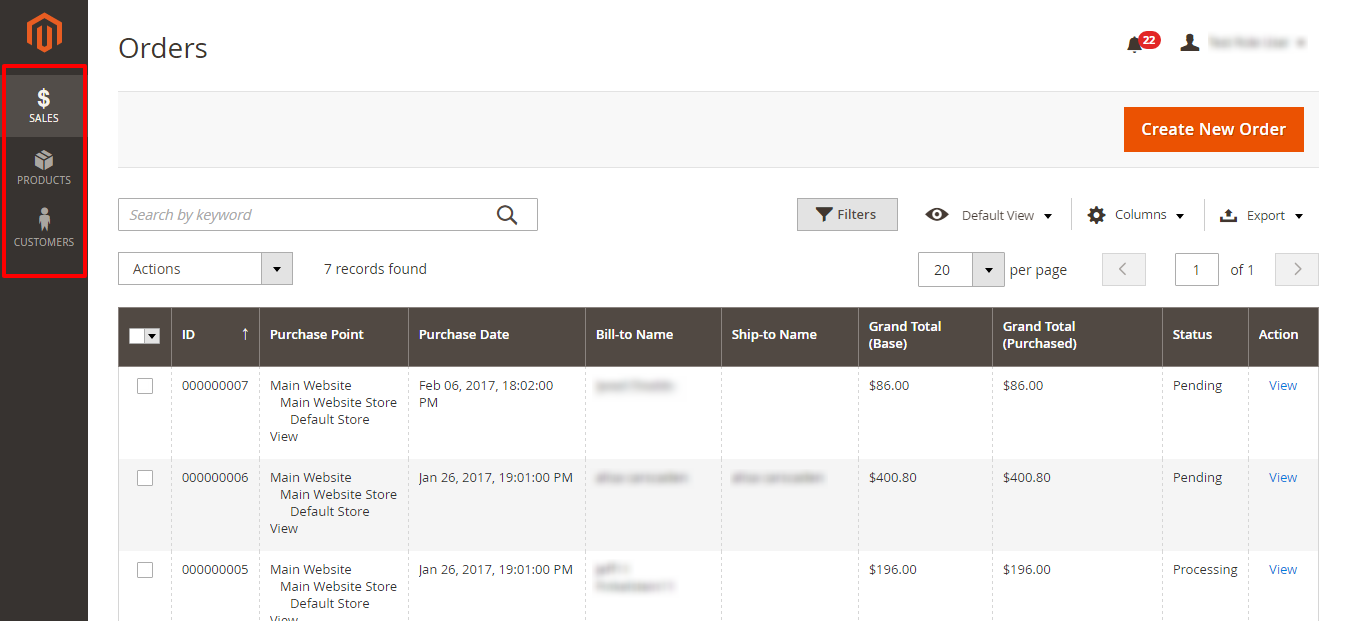
In our Customer Service Representative example we log in as a test user and can already see how simplified the admin menu has become:
Among many others, examples of Admin Roles you may need to create for your store include:
- Sales Representative
- Developer
- Copywriter
- Marketing Specialist
- Accounting
Our Professional Recommendation:
Although Magento 2 automatically includes the Administrators Role, we recommend keeping one “master” admin assigned to this role that only the store owner has access to, and creating an additional System Administrator Role with access to all areas of the Dashboard with the exception of the User Roles segment:
This ensures that you always have a user with master admin access in case one of the System Administrator roles you created is unintentionally or maliciously modified. All it takes is one disgruntled employee with full admin privileges to delete all of your users and user roles and wreak havoc on your system’s configurations!
Having a System Administrator role safeguards your store from a cataclysmic event like this. You can grant access to the All Users portion of the Permissions segment if you want other administrators to be able to create new users, but keep in mind this gives them the ability to delete users as well!
Recap
You should now know why it is important to create user roles within Magento 2, how to create new roles, and how to test roles out before assigning new users to those roles. User Roles in Magento 2 offer unlimited flexibility and control over your Magento 2 environment. The more active a store owner is in creating and maintaining these roles, the more structured and successful they can be!
We are always looking for ways that we can help the Magento community grow, so please let us know any questions or feedback you have!

About Jared Sheilds
Jared is a Senior Project Manager at Customer Paradigm. He is focused on every aspect of providing the most customer-centric experience possible and loves helping his clients get the most of the e-commerce experience. Outside of the office, Jared can be found throwing around a frisbee or on one of Colorados many hiking trails.
LinkedIn