Many eCommerce sites have customers from all over the world. It can be helpful to show your site in more than one language in order to accommodate customers who speak other languages. Or if your shop is based in a country that has more than one prominent language, you can cater to more customers by having multiple language offerings.
For example, if your store was based in Canada, and your primary customer base was Canadians, you might have customers from both the English and French-speaking regions of Canada. So you may want to offer a store view in French to accommodate customers who would prefer to view sites in French.
In this article, we will look at an overview of Magento 2 store views and how to create store views in other languages.
Magento 2 Store Views
To display a store with different languages in Magento 2 you need to create different Store Views. Having more than one language Store View can be helpful to widen your range of customers and improve the shopping experience for your customers who speak different languages as their primary language.
You can create a Store View in your Magento 2 store which allows the customer to choose which language they would prefer to view the site in on the front end of your store.
Here is an example of the end result on your front end:
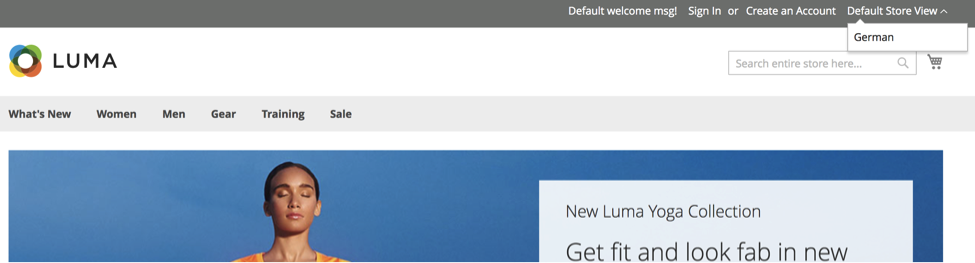
How to Create a Store View in Another Language
Step 1: Language Packs
To get started, first you will need to purchase and install a Language Pack:
- Go to the Magento Marketplace
- Select the Translations and Localizations Category
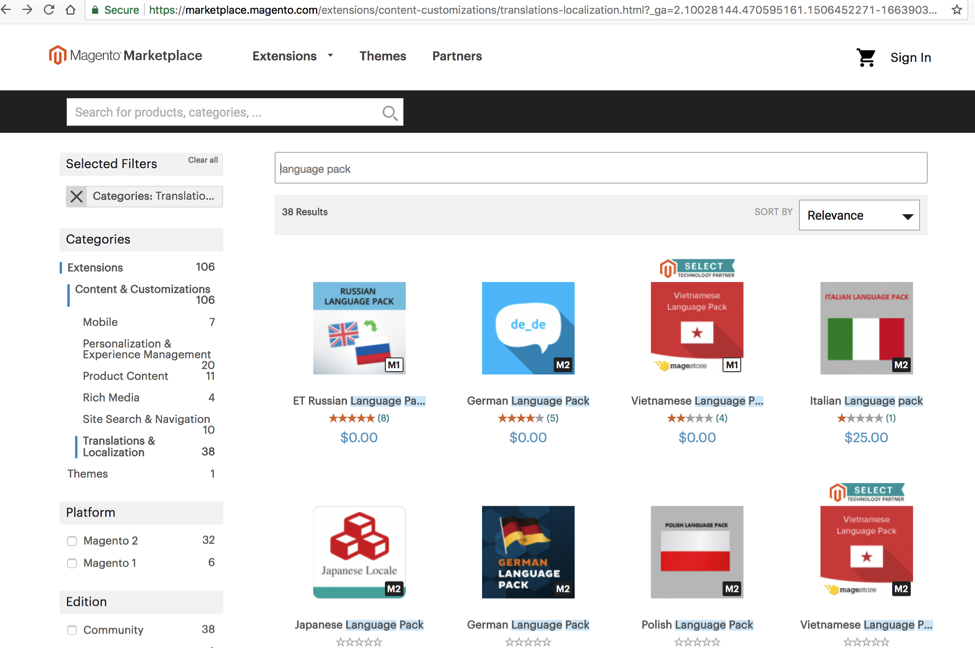
- Download a Language Pack and Install. Note: A lot of them are free, or low cost!
- Install the extension – if you aren’t comfortable installing an extension, you may need your Certified Magento Developer to complete this step
- If you are planning to install the extension yourself, the Magento 2 dev doc with the steps to install the extension through the admin with Component Manager can be found here: http://docs.magento.com/m2/ee/user_guide/system/component-manager.html
Best Practices Tip: Always be sure to install extensions on a test/development environment first.
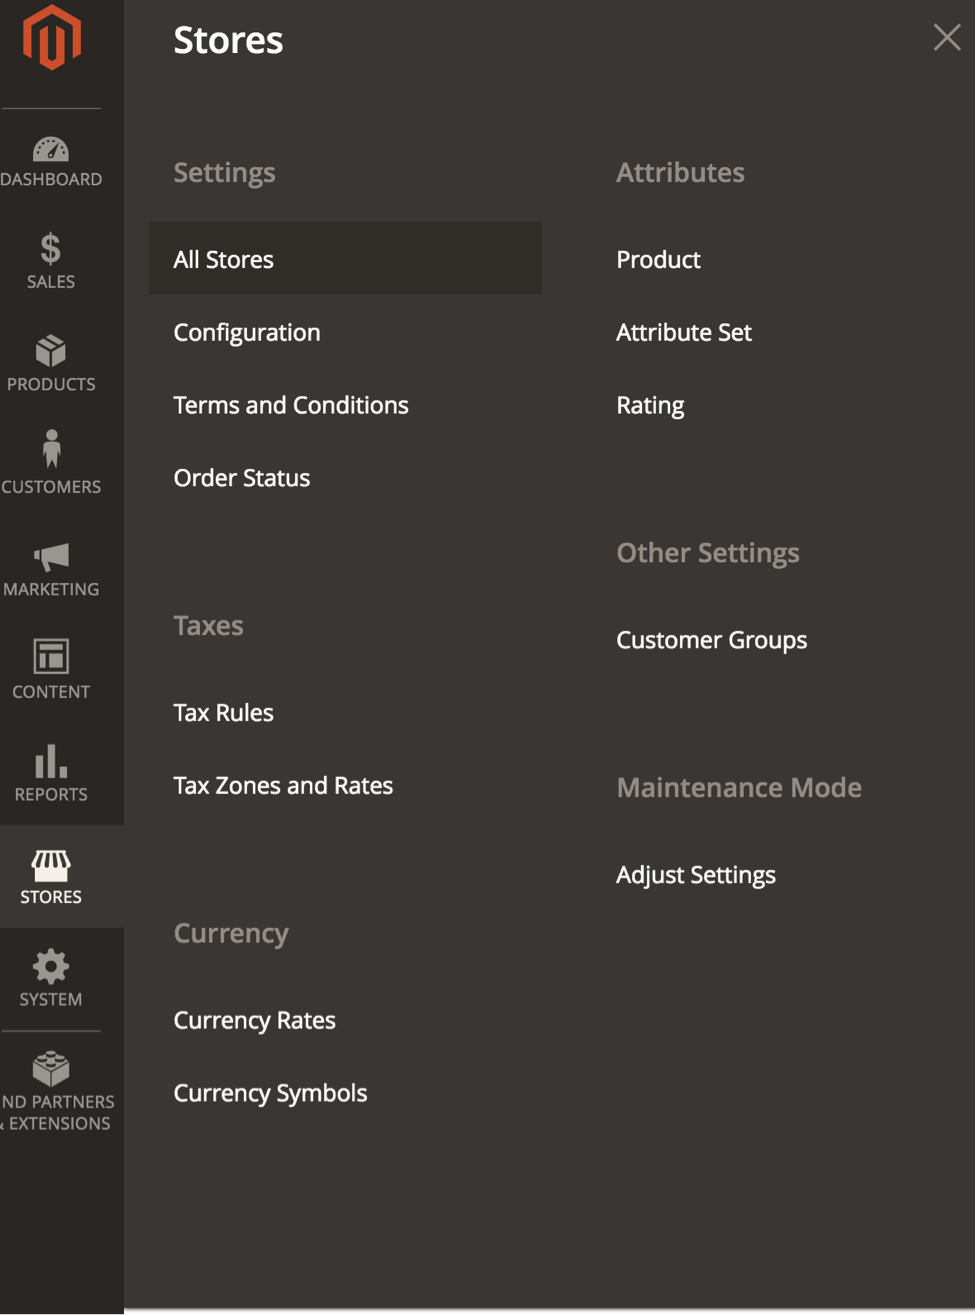
Step 2: Create the Store View
Once you have the language pack installed, you can create the new store view.
- Navigate to: Stores > All Stores
- Select the Create Store View button on top right and fill in the following fields:
- Store – choose your Parent Store, in this case, it was “Main Website Store”, this will typically your default choice here, and often you will have no other options available unless you have already set up other Store Views.
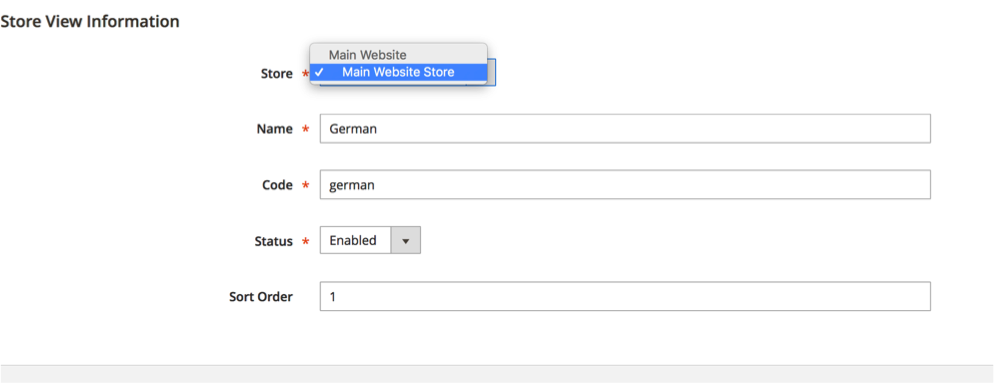
- Name – For this field you will use the name of the language you are adding
- Code – Enter in the name of the language of the Store View you are creating, for this example “german”, in lowercase. This will be the Store View label that is used in the back-end.
- Status – You will need to change this field to Enabled
- Sort Order – enter in a number to set the order this will show up in lists on your administrative back-end, “0” would make this store view show up first
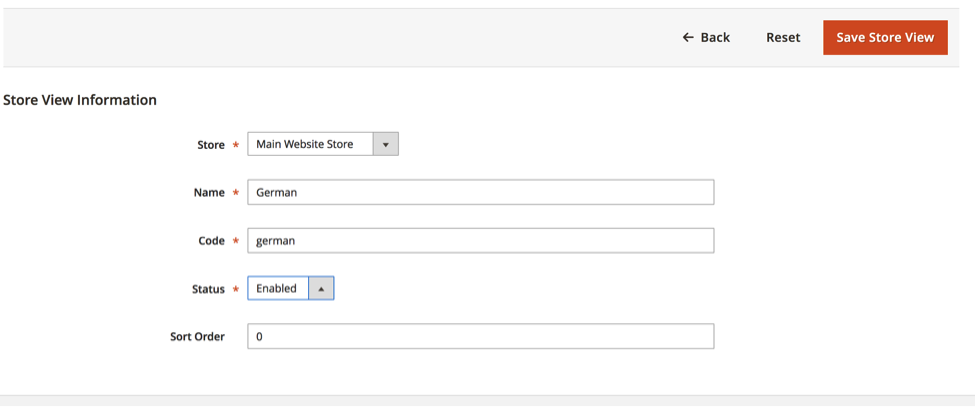
- When you have completed this fields be sure to click Save Store View
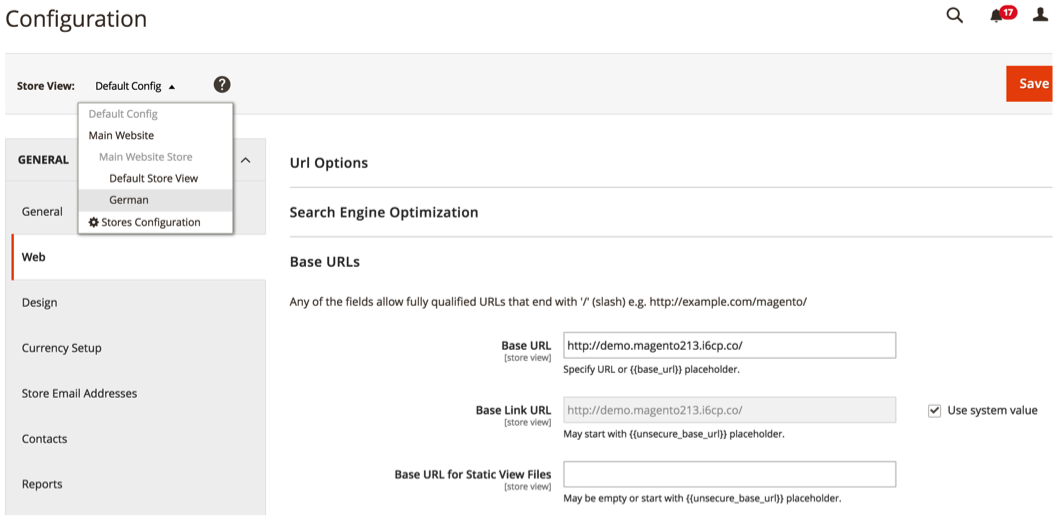
Once you have created the new store view you then need to set up the URL for the store view.
- Navigate to Stores > Settings > Configuration
- From there go to General > Web
- Under Store View select the one you just created for your new language
- Confirm scope switching. Deselect the “use website” checkbox, so that you can edit this field
- Open the Base URLs section and type in your new URL, for this example: myurl.com/german/
Important Note: An additional step requiring developer knowledge will be needed to enable this new URL for your Store View. Not sure how to complete this step? We suggest working with a Certified Magento Developer.
- If you are on an Apache server: http://devdocs.magento.com/guides/v2.0/config-guide/multi-site/ms_apache.html
- If you are on an Nginx server: http://devdocs.magento.com/guides/v2.0/config-guide/multi-site/ms_nginx.html
Step 3: Change the Locale of the Store View
- Navigate to Stores > Configuration > on the top left – choose your new store view –
- Change scope – Select Yes
- From here, expand the Locale Options section
- Local – deselect the “use website” checkbox that makes the field not editable
- Choose the Language you would like from the drop-down
- When you have completed this step select Save Config

Changing the locale of the view makes the text reference a different translation table, instead of translating the text word by word, this setting can change the language all at once.
The text that can be changed includes navigational titles, labels, buttons, and links such as “My Cart” and “My Account.”
After viewing the front-end of your site, if you are seeing language that isn’t, that you feel will be confusing, or would be better to be in that Store View’s other language, then enable the inline translation tool, to translate text on the Store View
- To enable the inline translation tool, navigate to: Stores > Settings > Configuration > Advanced > Developer
Step 4: Manually Translating Additional Content
After setting up the Store View, installing the language pack and setting the locale, you may have some content that will need to be manually translated.
In this example, you can see the translation in the Add to cart button, and the search bar text but the attributes, category names and product title haven’t been translated yet – so they will need to be set up with a translation manually in your backend admin.

Translating Products
- Navigate to: Products > Catalog > Click edit on the product you would like to edit
- Change Store view to the new Language Store View
- Deselect use default value for name
- Edit all other fields that need to be in the new language
- Save
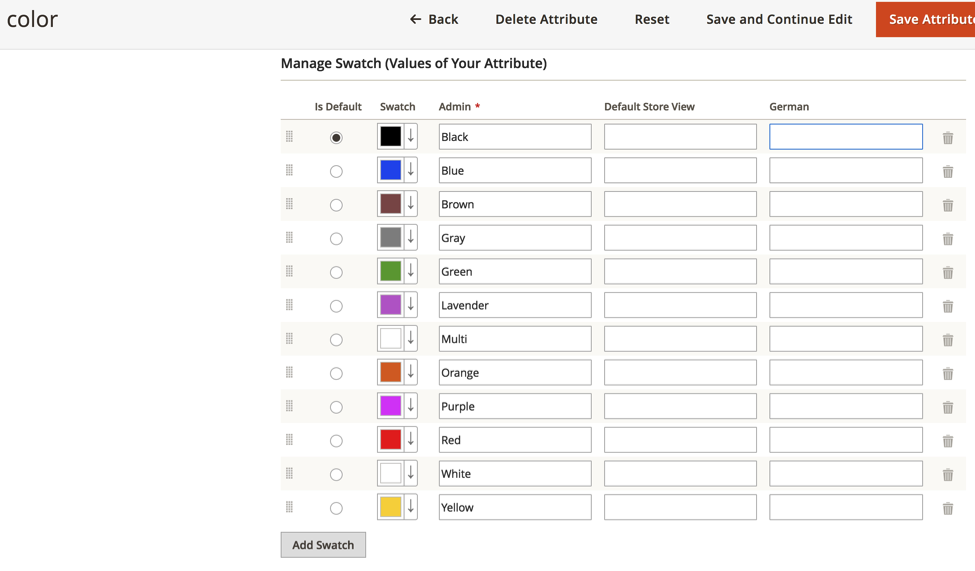
Translating Attributes
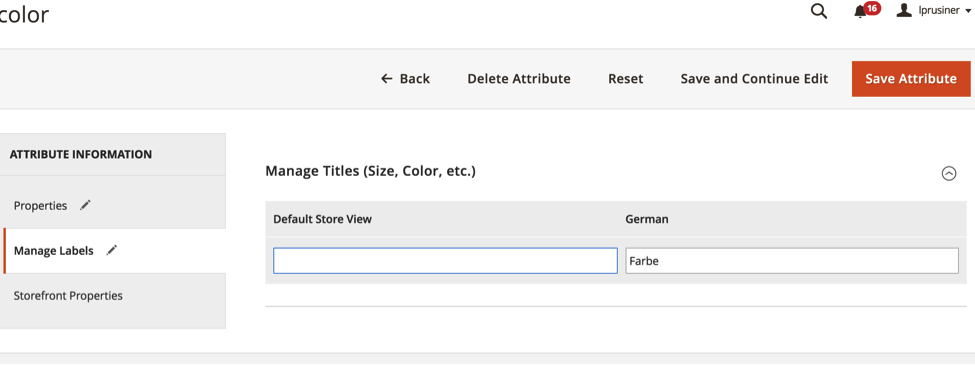
- Navigate to: Stores > Attributes > Product
- Click on the Attribute you’d like to edit
- Manage Labels – here you can add the translation for the attribute “color” in the “german” column
- Properties – in the Properties tab – you can put in the German translation for the options for your attribute, in this example, “color” – you can put in the German translation for each color here in the new column “German”
Translating Categories
- Navigate to: Products > Categories
- Select the Store View, for this example German
- Deselect -the Use Default Value checkbox next to url key field, enter the translated text
- General Information – change the name to the translated names
- Check that the Create permanent redirect for old url is selected
Translating CMS pages
- Navigate to: Content > Pages >
- May need a translated version
- Edit the page you need to translate
- Copy url key
- Then add new page
- Paste the url key
- Choose the Store View – German
- Click on Content – type or paste in your German content there
- Save
Closing Thoughts
Offering store views with a different language can be a great tool for your online store. Analyze where your customers are coming from, and what languages they speak to see if this would be a good solution for you.
Need help creating Store Views in different languages? We can help! Connect with us today to start reaching your eCommerce goals.

About Leah
Leah is a Project Manager at Customer Paradigm. Leah's passion lies in email marketing, WordPress and building strong client relationships with her clients to ensure success on every project.