Creating and editing email templates in Magento 2 is very similar to the equivalent process in Magento 1. The primary difference between Magento 1 and Magento 2 is that these templates have been renamed from “Transactional Emails” to “Email Templates.” You can still find and customize default Magento 2 email templates as well as add new templates to use for your store. This guide will show you how to view and edit the default templates packaged with Magento 2 as well as how to create new templates to effectively represent your store’s branding and messaging with ease!
Templates Location
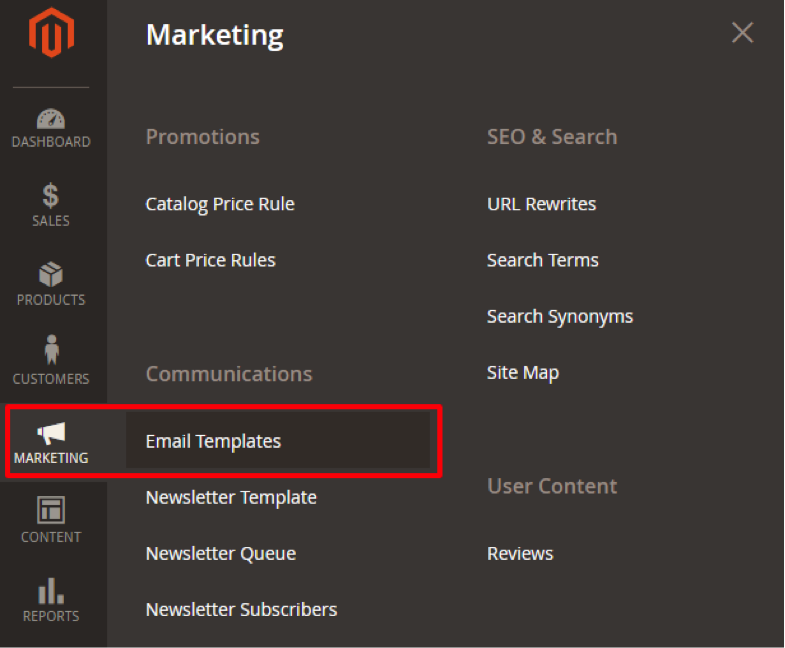
You can find Email Templates in the Magento 2 dashboard under Marketing > Email Templates:
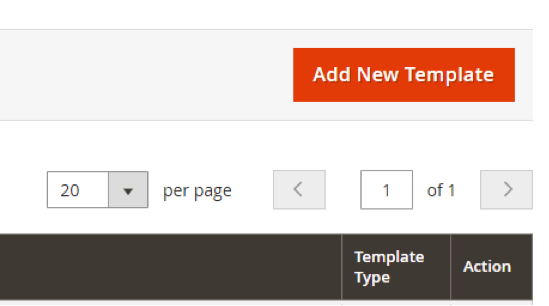
In a fresh installation of Magento 2, you won’t see any Email Templates listed in the grid by default. In order to edit or create a template, click Add New Template in the upper right corner.
Editing a Default Email Template
In order to edit one of the default, Magento 2 templates first click into the Add New Template page. At the top of the page you will see the Load default template section:
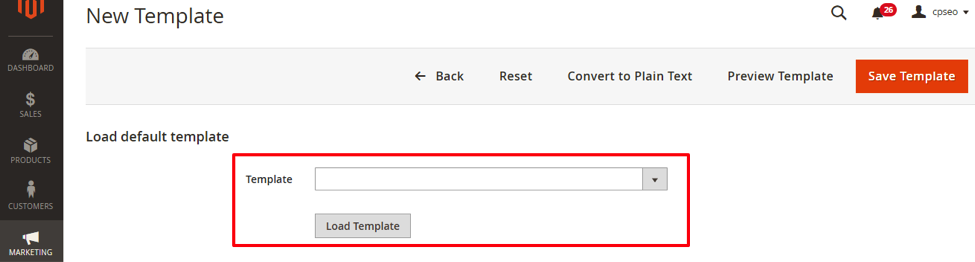
In order to edit one of the default Magento 2 templates first click into the Add New Template page. At the top of the page you will see the Load default template section:
- Payment Failed
- Contact Form
- Change Email
- Change Email and Password
- Forgot Password
- New Account
- New Account (Magento/luma)
- New Account Confirmation Key
- New Account Confirmed
- New Account Without Password
- Remind Password
- Reset Password
- Currency Update Warnings
- Footer
- Footer (Magento/luma)
- Header
- Subscription Confirmation
- Subscription Success
- Unsubscription Success
- Cron Error Warning
- Price Alert
- Stock Alert
- Credit Memo Update
- Credit Memo Update (Magento/luma)
- Credit Memo Update for Guest
- Credit Memo Update for Guest (Magento/luma)
- Invoice Update
- Invoice Update (Magento/luma)
- Invoice Update for Guest
- Invoice Update for Guest (Magento/luma)
- New Credit Memo
- New Credit Memo (Magento/luma)
- New Credit Memo for Guest
- New Credit Memo for Guest (Magento/luma)
- New Invoice
- New Invoice (Magento/luma)
- New Invoice for Guest
- New Invoice for Guest (Magento/luma)
- New Order
- New Order (Magento/luma)
- New Order for Guest
- New Order for Guest (Magento/luma)
- Order Update
- Order Update (Magento/luma)
- Order Update for Guest
- Order Update for Guest (Magento/luma)
- Shipment Update
- Shipment Update (Magento/luma)
- Shipment Update for Guest
- Shipment Update for Guest (Magento/luma)
- Send Product Link to Friend
- Sitemap Generation Warnings
- Forgot Admin Password
- User Notification
- Wish List Sharing
Depending on your store’s setup you may see additional templates in this dropdown- this is because different themes and extensions may add new templates to accommodate additional functionality. Any of these templates can be edited in the same manner as default Magento 2 templates.
Once you have selected the template you wish to edit click “Load Template” and you will see the Template Subject and Template Content fields populated with the default values:
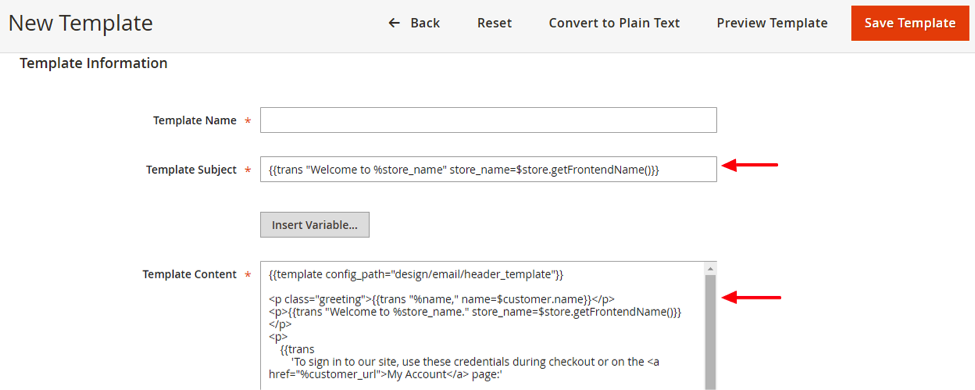
Give your new template a descriptive title to differentiate it from the default template. At this point you can edit any of the HTML and CSS values in the subject or content sections, as well as add any content not included in the default.
You can also add or edit variables to Email Templates from this page. Magento variables are snippets of code which pull specific pieces of information from various locations within Magento into a template to enhance the customization and tailoring of your Email Templates. The “{{var customer.name}}” variable, for example, will pull in a registered customer’s name and display it within the email to make your store’s communications more personalized.
You can add a variable to any Email Template by placing your cursor in the location you would like to add the variable and clicking “Insert Variable…”

These are the variables you can add to any template with default Magento 2:
- Base Unsecure URL | {{config path=”web/unsecure/base_url”}}
- Base Secure URL | {{config path=”web/secure/base_url”}}
- General Contact Name | {{config path=”trans_email/ident_general/name”}}
- General Contact Email | {{config path=”trans_email/ident_general/email”}}
- Sales Representative Contact Name | {{config path=”trans_email/ident_sales/name”}}
- Sales Representative Contact Email | {{config path=”trans_email/ident_sales/email”}}
- Custom1 Contact Name | {{config path=”trans_email/ident_custom1/name”}}
- Custom1 Contact Email | {{config path=”trans_email/ident_custom1/email”}}
- Custom2 Contact Name | {{config path=”trans_email/ident_custom2/name”}}
- Custom2 Contact Email | {{config path=”trans_email/ident_custom2/email”}}
- Store Name | {{config path=”general/store_information/name”}}
- Store Phone Number | {{config path=”general/store_information/phone”}}
- Store Hours | {{config path=”general/store_information/hours”}}
- Country | {{config path=”general/store_information/country_id”}}
- Region/State | {{config path=”general/store_information/region_id”}}
- Zip/Postal Code | {{config path=”general/store_information/postcode”}}
- City | {{config path=”general/store_information/city”}}
- Street Address 1 | {{config path=”general/store_information/street_line1″}}
- Street Address 2 | {{config path=”general/store_information/street_line2″}}
*Note that different Email Templates may display different variables depending on their purpose. The Email Template for New Account, for example, also includes these variables:
- Customer Account URL | {{var this.getUrl($store, ‘customer/account/’)}}
- Customer Email | {{var customer.email}}
- Customer Name | {{var customer.name}}
In the same way that an extension or theme may add new Email Templates to your store’s arsenal, they may also add new variables which can be used to enhance your customer experience.
Click on the variable you would like to add and you will see it automatically populate in your cursor’s location.
Depending on the template you are editing and your knowledge of HTML and CSS you may want to view the email template you are editing in plain text format- you can do this by clicking “Convert to Plain Text” in the page header:

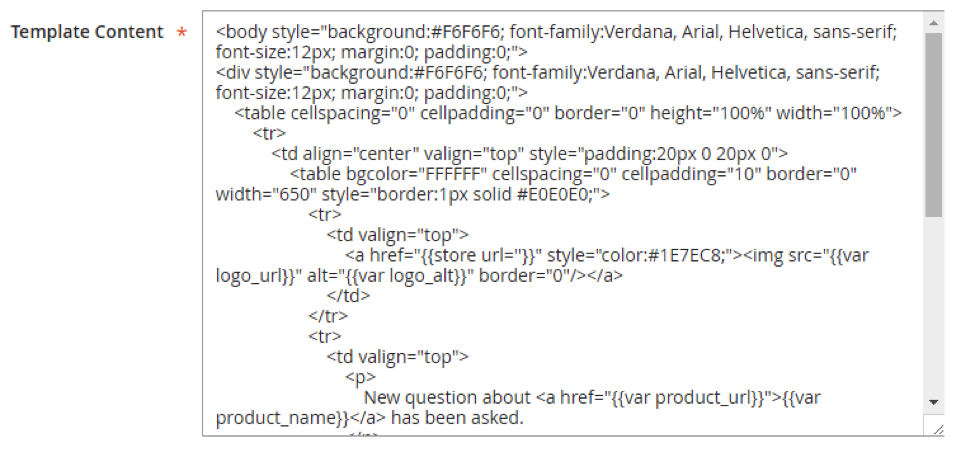
This action removes all HTML tags from the Template Content field which can make the content easier to read as it only leaves the template variables and plain text. This is what a template may look like with all HTML and CSS content in place:
And this is what the same template looks like when converted to plain text:
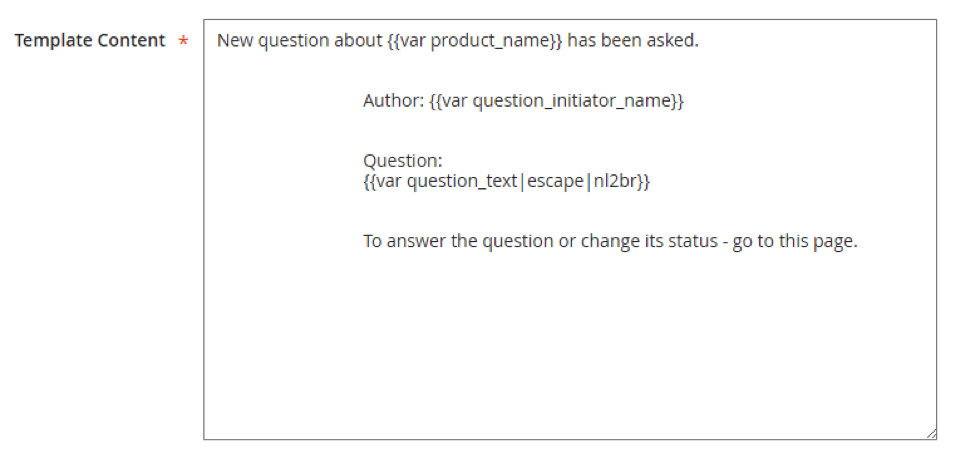
As you can see the actual content is much easier to read and understand with the tags stripped which allows you to quickly and efficiently find specific pieces of information that you’d like to edit. You can then click “Return HTML Version” to restore the stripped tags to the template.
It should be noted that changes are not saved when switching back and forth between “Convert to Plain Text” and “Return HTML Version,” so it is not recommended that you make any changes while viewing the plain text version.
Clicking “Reset” in the page header will erase any changes you have made and return you to the blank New Template page.
You can preview your changes to an email template at any point by clicking the “Preview Template” button. This opens a preview of the email in a new tab which allows you to make changes and test them before saving the template.
It is possible to add CSS styles to the email template in the Template Styles field at the bottom of the New Template page, however, we generally recommend avoiding housing your styles in this field as certain email clients will not pick up this CSS which will result in your templates displaying improperly. To make sure your email styles appear on as many different email clients as possible it is recommended that you use inline CSS as much as possible.

Once all of your edits have been made to a template, you can save your changes by clicking “Save Template” in the upper right corner of the page.
*Note that any template you are editing which are not the default Header or Footer email templates will not reflect changes to those respective portions of the email unless you remove the following variables from the template:
- {{template config_path=”design/email/header_template”}}
- {{template config_path=”design/email/footer_template”}}
How to Use New or Edited Email Templates
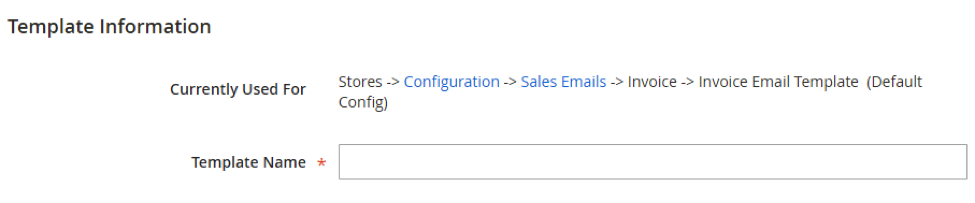
Once you have created a new template or edited a default template you must navigate to Stores > Configuration to actually utilize the template. If you aren’t sure where the settings are for your particular email template, you can often find this by loading in the default Magento template on the New Template page and looking for the “Currently Used For” section which displays the configuration path to the setting you need to change:
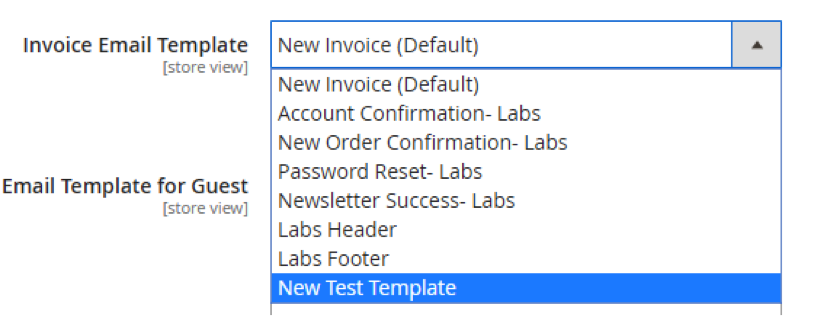
Once you navigate to the appropriate configuration tab for your template, you can swap templates by selecting yours from the drop-down by that particular setting:
The two exceptions to these settings residing in Stores > Configuration are the settings for the Header and Footer templates. These can be found under Content > Configuration > Your Theme >Transactional Emails. This tab allows you to set the Header and Footer templates to use as well as define which logo image to use in any Email Template.
Recap
Whether you have recently migrated to Magento 2 or you are a new Magento 2 store owner, utilizing simple edits to Magento Email Templates can have a significant impact on your store’s message. Using the tools outlined above you should be able to add or edit Magento 2’s Email Templates with ease, so start improving your brand today!
If you don’t have the HTML and CSS knowledge to build more advanced and technical designs into your Email Templates contact Customer Paradigm today and we will build beautiful templates that will help expand your store’s online presence and branding!

About Jared Sheilds
Jared is a Senior Project Manager at Customer Paradigm. He is focused on every aspect of providing the most customer-centric experience possible and loves helping his clients get the most of the e-commerce experience. Outside of the office, Jared can be found throwing around a frisbee or on one of Colorados many hiking trails.
LinkedIn