
Layered navigation provides a way to filter products on your Magento 2 store by certain attributes. The layered navigation is typically found on category pages, on the left side of the page. Some other names people may use for it are filters or the left sidebar – but in Magento 2 it is most commonly referred to as the Layered Navigation.
Layered navigation is a great tool for customers to narrow down the product listings based on specific attribute parameters within the category page. Customers may want to filter by price, color, or many other attributes using the layered navigation.
In this blog, we will go over how to enable and configure the layered navigation in Magento 2.
Layered Navigation – The Basics
Products Available for Layered Navigation
Any product attributes that are dropdown, multiple select, or price input types can be used in your Layered Navigation. Other input types can’t be used by default and would require custom development.
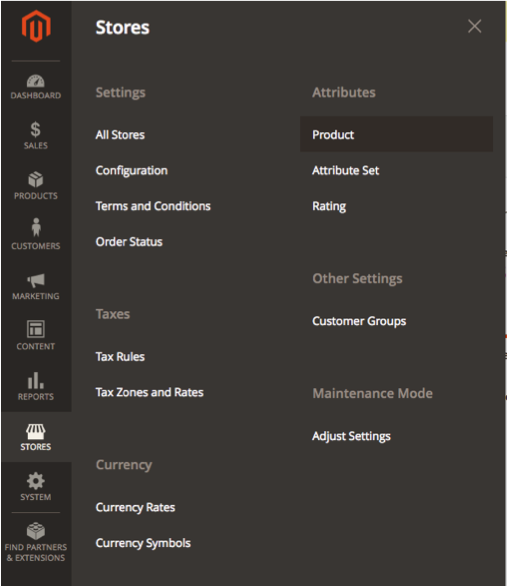
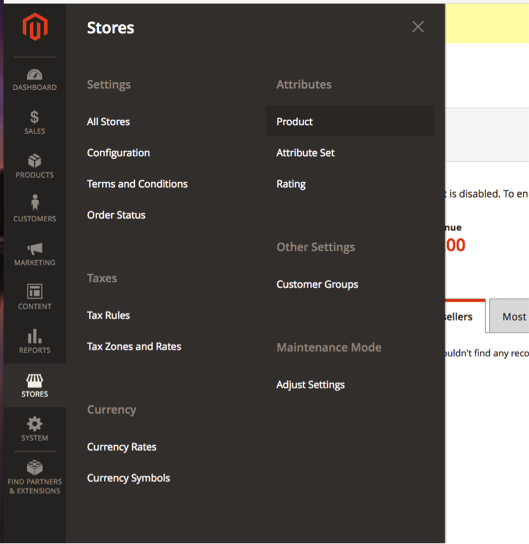
You can see the product’s input type in your attribute settings by navigating to Stores > Attributes > Product. From here select your attribute from the list to see the attribute properties.
Color Swatches in Layered Navigation
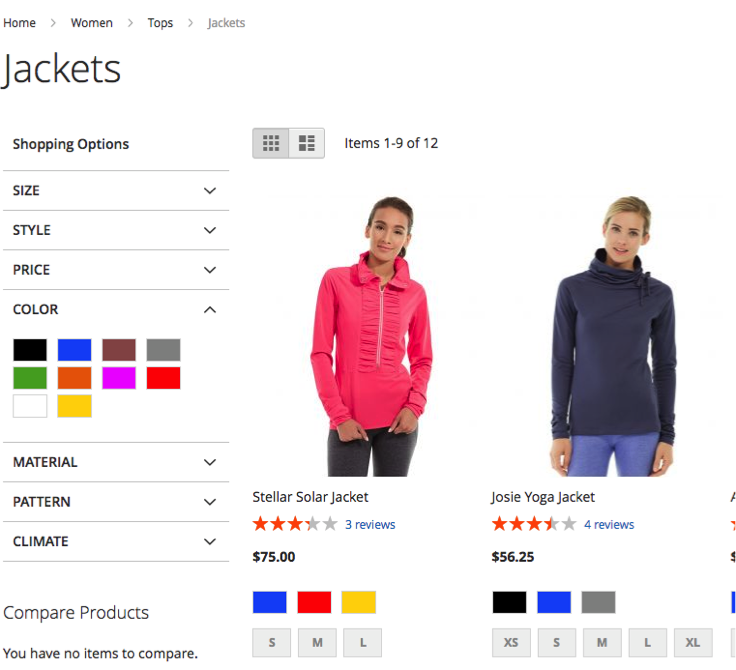
If you are using the attribute “Color” with Magento 2 you can set up visual swatches for your color labels and they can be applied to the Layered Navigation. You will see the input type as “visual swatch”. Here you can see color swatches to show the different colors you can filter by on a category page:
Note: A layered navigation value will only display the values or attributes that pertain to that category page and the product collection displayed.
General Layered Navigation Settings
When setting up layered navigation on your Magento 2 store you must first review the Layered Navigation general settings.
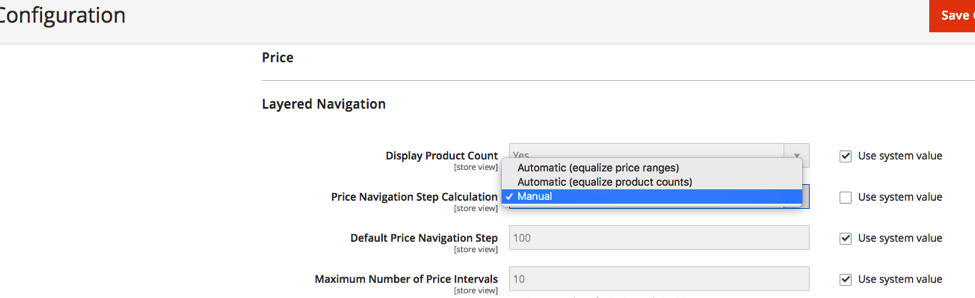
To set up your general layered navigation settings, from your Magento 2 backend dashboard navigate to: Stores > Configuration > Catalog section > Catalog > scroll down to the “Layered Navigation” section.
First, you will see the option to set your layered navigation to either show product count or not.
To make this dropdown editable uncheck “use system value”. In this example, the option to show product count is set to “yes”.
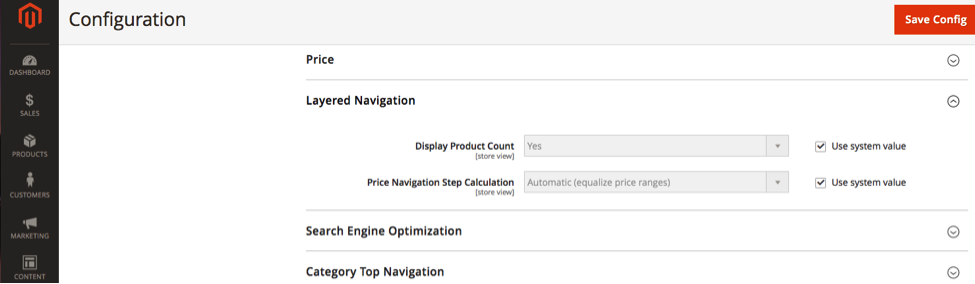
Setting this option to “yes” means that on the category pages with layered navigation enabled, the attribute results will show a number in parentheses next to the option which represents the number of products that match that label. If you choose to set this option to “no” then this product count will not appear on your Magento 2 store.
Front-end example:
If you will be using “price” as one of the filters in your layered navigation you will set this up at this time from the “Price Navigation Step Calculation” drop-down menu. You can auto-create price increments or set them manually.
Setting Layered Navigation Attributes
Next, you will set your attributes – these are the options that you want to show up in the Layered Navigation.
If you do not already have product attributes set up and assigned you will need to do this first. To learn more about setting up product attributes in Magento 2 check out our guide.
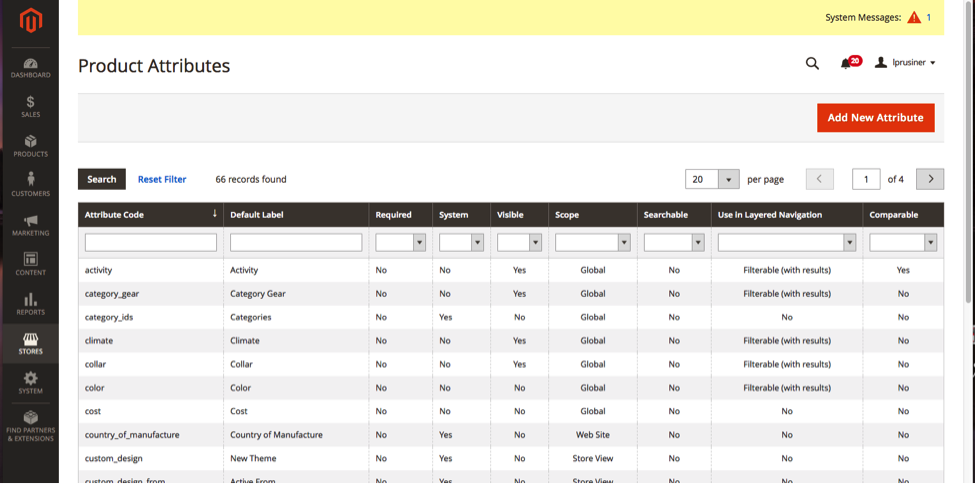
Once your attributes are set up, from your backend dashboard you will navigate to: Stores > Attributes > Product
Search for your attribute, by typing into the blank fields – or just look for it in your list, then click on the row of the attribute to “Edit”
Under “Storefront Properties” Select the drop-down next to “Use in Layered Navigation”
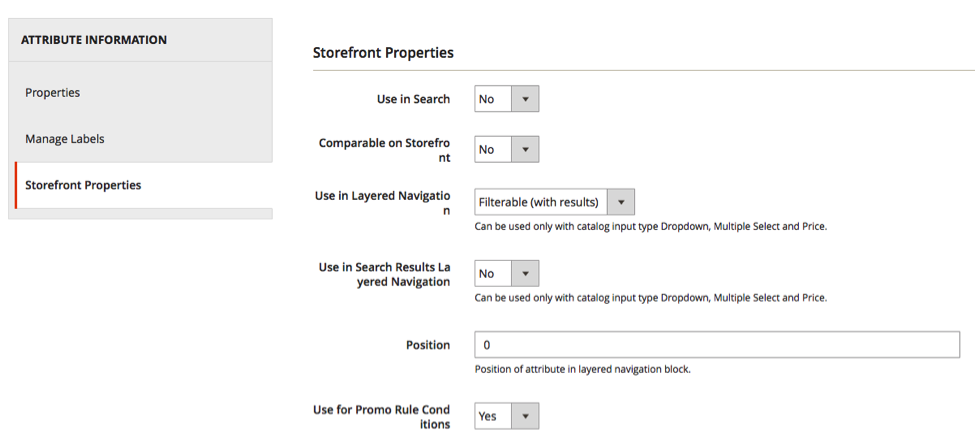
This drop-down menu has two options:

- Filterable with results – will only show available options – options that have products matching those options on that category page.
- Filterable no results – will list out all options you have for that attribute, not just the ones that have product matches on that category page.
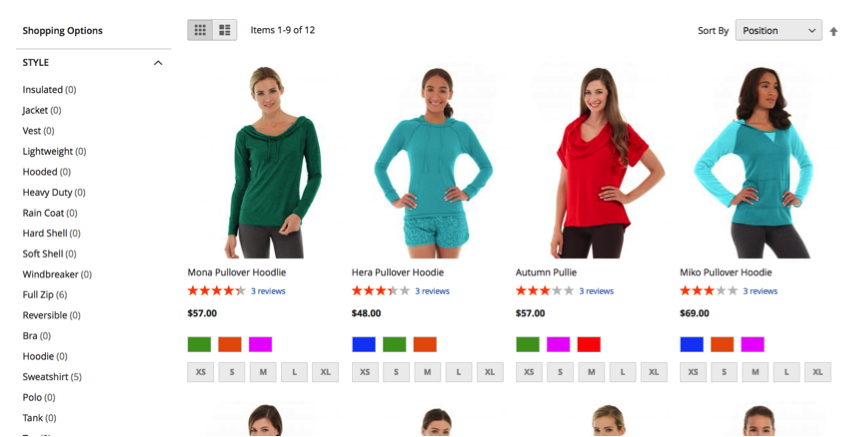
Filterable (no results): Front End Example
See in this attribute “Style,” it is listing out all options – insulated, jacket, vest, but a lot of them have 0 results – the number next to it in parentheses.
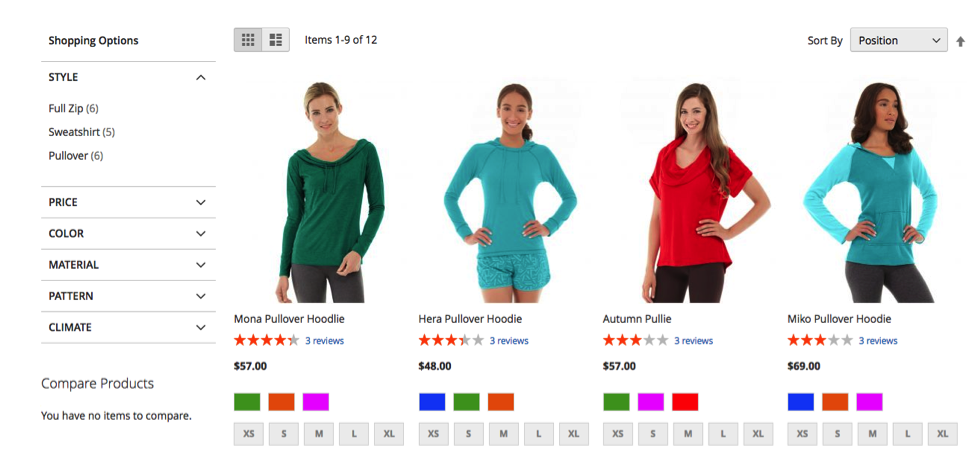
Filterable (results): Front End Example
Only showing the options with results for the attribute associated. You’ll notice many of the options listed in the previous example are no longer displaying in the layered navigation. That is because there are no products associated with that attribute (i.e. ‘Insulated’).
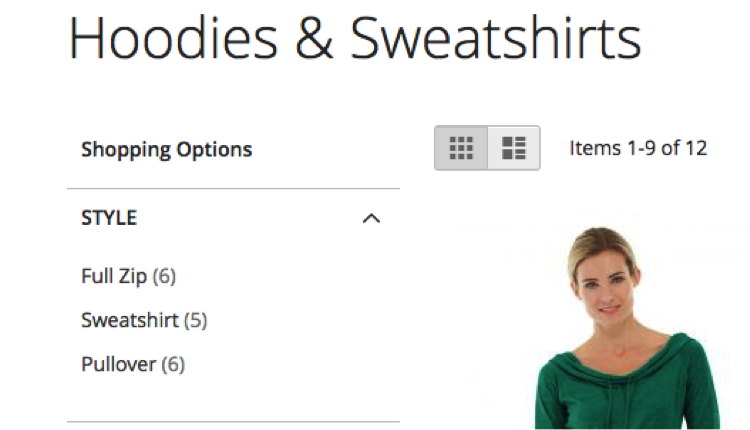
For example if you are filtering by “Style”, the “Sweatshirt” option says (5) next to it – meaning there are 5 products that are the “Sweatshirt” style.
When you have made you selection click “Save Attribute”. Once you click save, a pop up will display telling you to clear cache.

To learn more about clearing you cache in Magento 2 check out our guide.
If you also want this attribute to show up on your search results pages as a filter, select “Use in Search Results Layered Navigation” set to “Yes”

Click “Save Attribute”
You will repeat this set up for each attribute you want to show up in the Layered Navigation
Setting Anchor Categories
To set up layered navigation on a specific category page, you will want to make that category an anchor. When a category is set to an anchor, it allows for the layered navigation to show up.
To set a category as an anchor, from your Magento backend dashboard, navigate to: Products > Categories
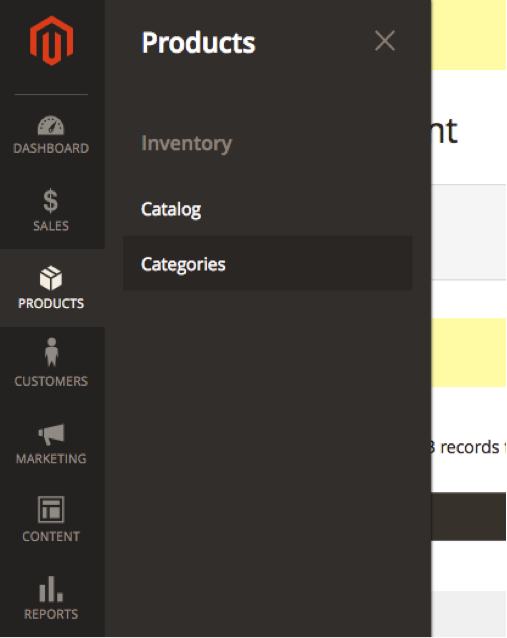
On the categories page, the left side is your category tree – if you don’t see your category in this top-level view, click on the blue + symbol or the category name to expand that category, and see its subcategories. Keep expanding categories until you have navigated to the category you are setting up Layered Navigation for.
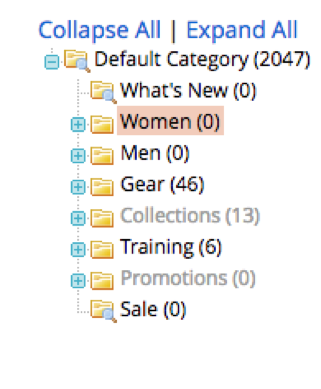
Quick Tip: If you want to quickly expand the category tree to see all categories and subcategories, click “Expand All” at the top of your Category tree.
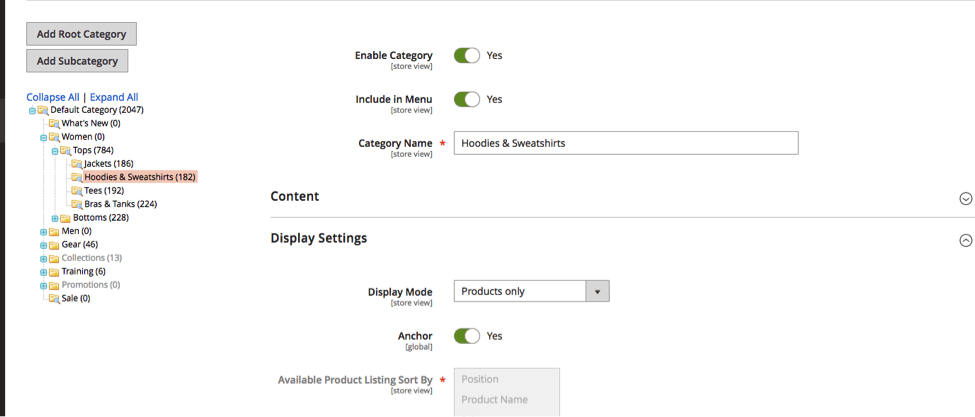
When you have selected your category, click on “Display Settings” to expand this section.
From here you will toggle “Is Anchor” to “on”. This is what allows your layered navigation menu to appear on that category page on your Magento store’s front end.
When you have made your selection be sure to hit “Save.”
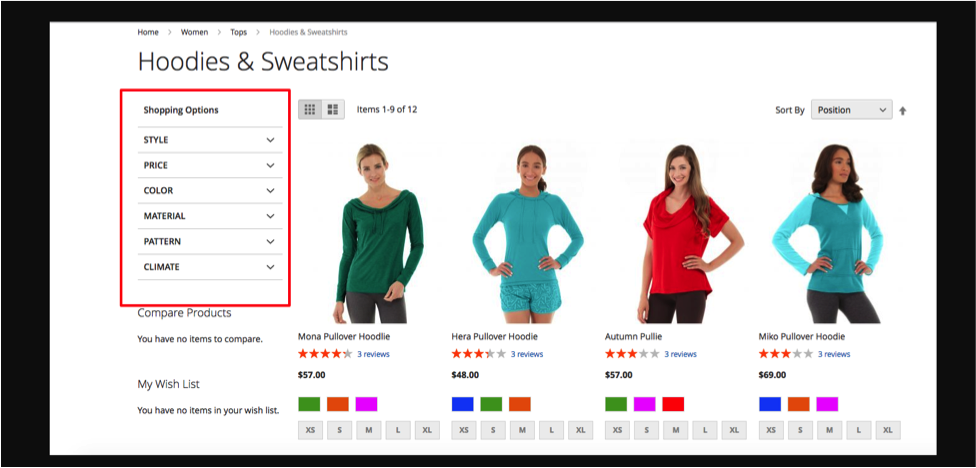
In this example I have made Women’s Hoodies & Sweatshirts an anchor category.
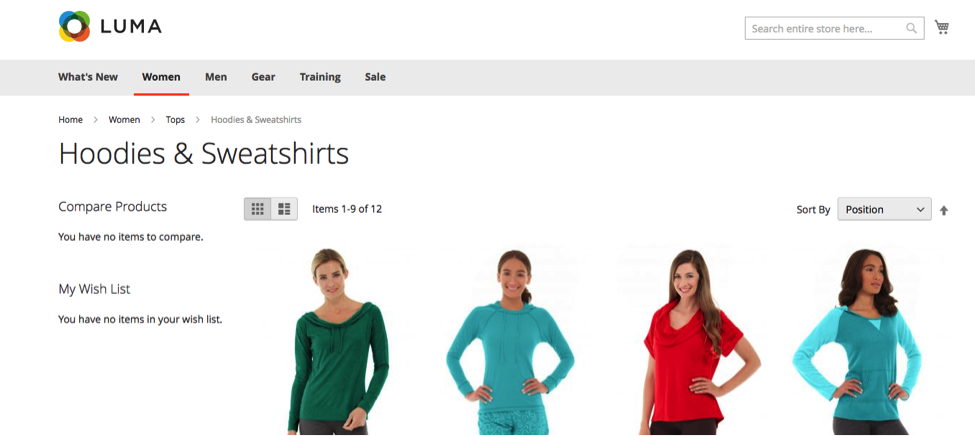
Here is what the category page “Hoodies & Sweatshirts” looks like on the store front end before you set it as an anchor category.
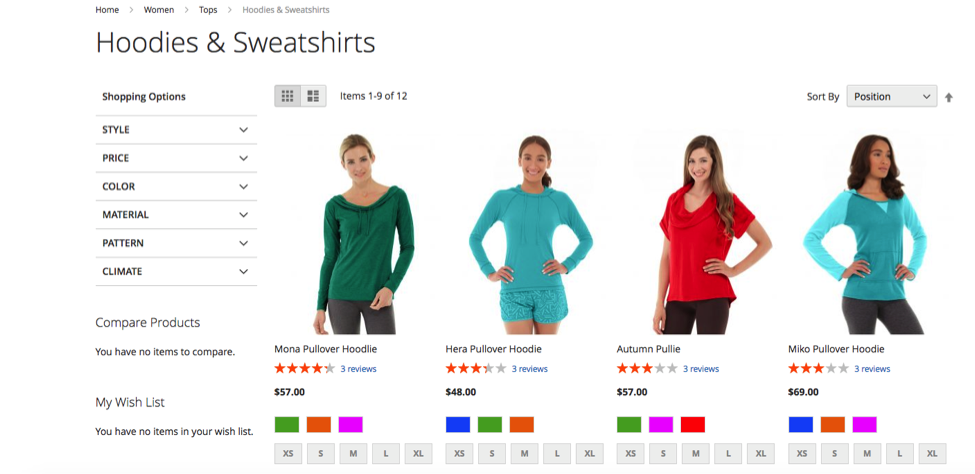
Here is what it looks like with Layered Navigation set up, and the Hoodies & Sweatshirts after you have set the category to an anchor.
Closing Thoughts
Layered Navigation can be a great asset to your Magento 2 site. It can improve your customer’s shopping experience by facilitating easy navigation through your site. With only a little bit of set up, you can provide your customers with more capabilities to find what they are looking for by the parameters they need.
Need help configuring layered navigation on your Magento 2 store? Want to create a layered navigation with custom options? Connect with a member of our strategy team today and start reaching your eCommerce goals.

About Leah
Leah is a Project Manager at Customer Paradigm. Leah's passion lies in email marketing, WordPress and building strong client relationships with her clients to ensure success on every project.