The Magento 2 platform offers a number of different ways you can allow your customers to pay. The standard Magento 2 install comes with basic payment methods that do not require any third-party involvement or setup. Offering different payment options maximizes the potential sales that can be made on your site. Additionally, this keeps your customers engaged and on your site instead of driving them away due to only having one type of payment option.
Natively Magento 2 has the option to set up Cash on Delivery, Check / Money Order, Purchase Order, and Bank Transfer without the need for 3rd party integration or configuration. Please note: To use credit cards on your site, you will need to use a 3rd party payment processor such as Authorize.net or PayPal. This article will focus on the standard options that are available to store owners immediately.
Getting Started
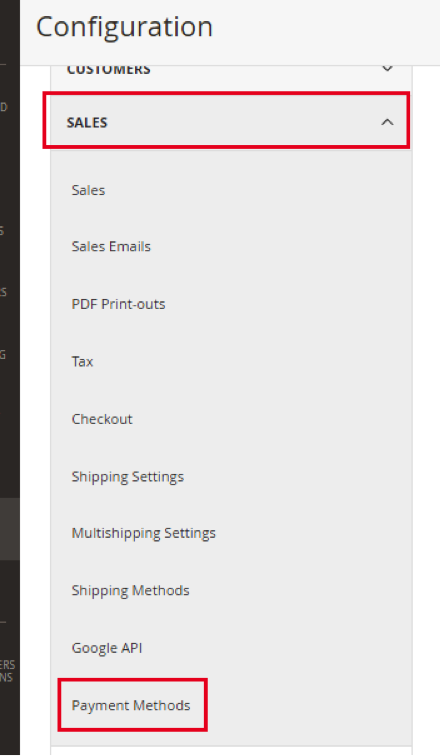
To begin, log in to the Admin of your Magento 2 site, and navigate to Stores > Configuration:

Next, click the Sales tab, then Payment Methods:
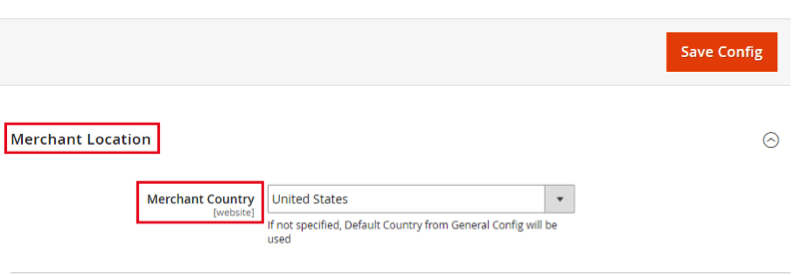
The first step of setting up your Payment Methods is to select your Merchant Country from the drop down, found under Merchant Location:
Next, you can go through each available option to determine which Payment Methods you’d like to enable and configure for your customers.
Note: You will see Braintree, Authorize.net, and different PayPal options that you can configure. For the sake of this article and focusing on Payment Methods that do not require third parties, we will skip these sections.
1. Check / Money Order
The first drop down is Check / Money Order. Magento 2 allows you to accept checks or money orders from specific countries of your choosing. You can also set minimum and maximum order total limits.
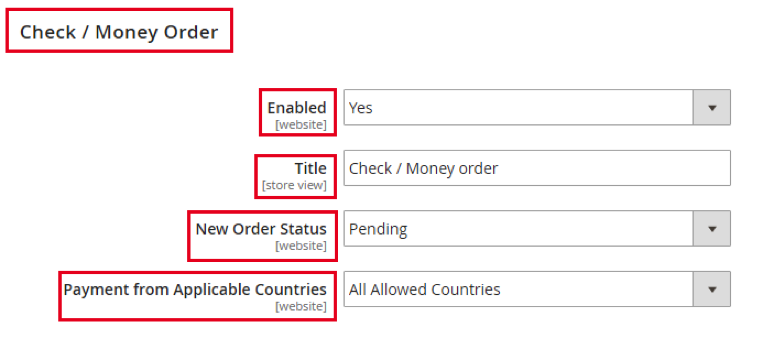
- Enabled: Set to Yes if this payment method is accepted
- Title: The name that will display for this payment method on the Checkout page
- New Order Status: Set this to Pending until payment is received
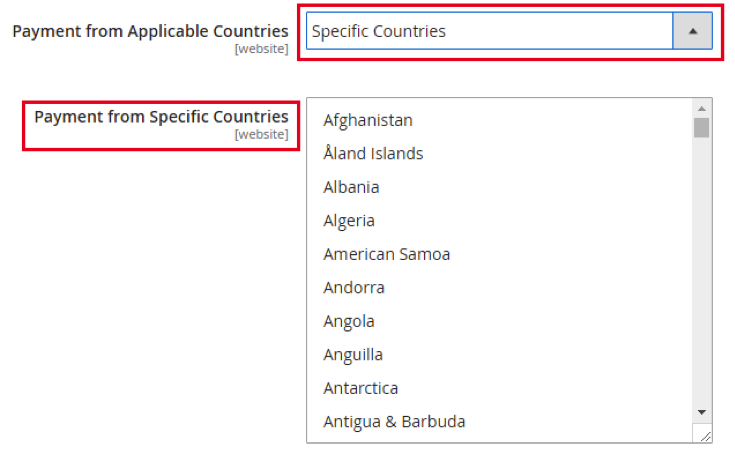
- Payment from Applicable Countries: Choose from one of the drop-down options:
- All Allowed Countries: This will allow customers from all countries selected in your store configuration to use this payment method
- Specific Countries: If this option is chosen, the Payment from Specific Countries list will appear – you can select the specific countries that this payment option will be available for
- Make Check Payable To: Enter the name of the person/company that checks should be written out to
- Send Check To: Enter the address where checks should be mailed to
- Minimum Order Total: Enter the minimum order total that needs to be met for this payment method to qualify for use
- Maximum Order Total: Enter the maximum order total that needs to be met for this payment method to qualify for use
- Sort Order: Enter a number to determine the position of this payment option in the list of payment methods that appear on the Checkout page (ex. 0 = first, 1 = second, etc.)

Once you have completed this section, click the Save Config button at the top right of the page.
2. Bank Transfer
The next payment method option is Bank Transfer. This allows your customers to pay for their products by transferring money from their bank account to your merchant bank account.
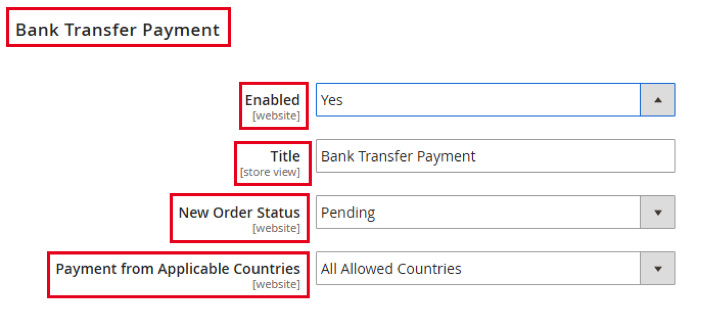
- Enabled: Set to Yes if this payment method is accepted
- Title: The name that will display for this payment method on the Checkout page
- New Order Status: Set this to Pending until payment is received
- Payment from Applicable Countries: Choose from one of the drop-down options:
- All Allowed Countries: This will allow customers from all countries selected in your store configuration to use this payment method
- Specific Countries: If this option is chosen, the Payment from Specific Countries list will appear – you can select the specific countries that this payment option will be available for
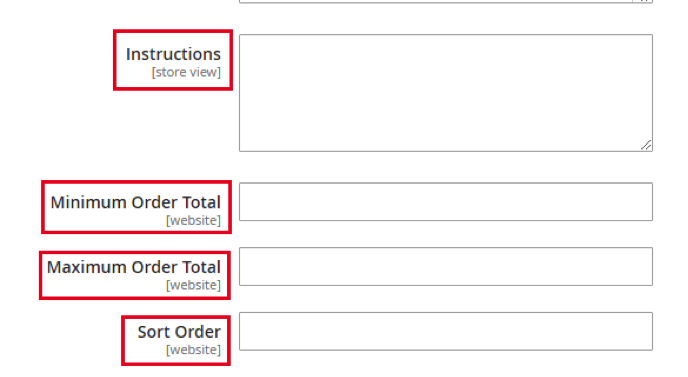
- Instructions: Enter in the steps your customers must follow to setup a bank transfer. Depending on your country and bank’s requirements, this may include the customer providing:
- Bank account number
- Bank routing number
- Bank name
- Bank address
- Minimum Order Total: Enter the minimum order total that needs to be met for this payment method to qualify for use
- Maximum Order Total: Enter the maximum order total that needs to be met for this payment method to qualify for use
- Sort Order: Enter a number to determine the position of this payment option in the list of payment methods that appear on the Checkout page (ex. 0 = first, 1 = second, etc.)
Once you have completed this section, click the Save Config button at the top right of the page.
3. Cash On Delivery
The next payment method option you can configure for your customers to use is Cash On Delivery. If this option is available, the shipping carrier that you use will receive the payment from the customer when the product is delivered. This is then delivered to you, the store owner.
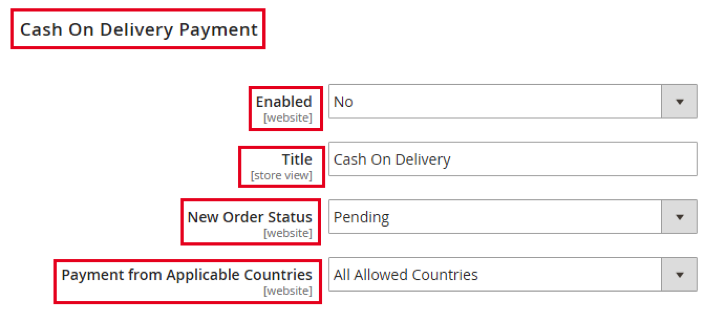
- Enabled: Set to Yes if this payment method is accepted
- Title: The name that will display for this payment method on the Checkout page
- New Order Status: Set this to Pending until payment is received
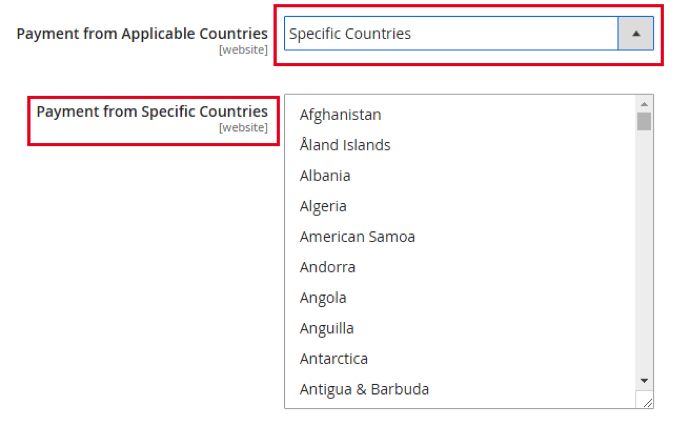
- Payment from Applicable Countries: Choose from one of the drop-down options:
- All Allowed Countries: This will allow customers from all countries selected in your store configuration to use this payment method
- Specific Countries: If this option is chosen, the Payment from Specific Countries list will appear – you can select the specific countries that this payment option will be available for
- Instructions: Enter in any specific instructions for your customers to note if they are using this payment method
- Minimum Order Total: Enter the minimum order total that needs to be met for this payment method to qualify for use
- Maximum Order Total: Enter the maximum order total that needs to be met for this payment method to qualify for use
- Sort Order: Enter a number to determine the position of this payment option in the list of payment methods that appear on the Checkout page (ex. 0 = first, 1 = second, etc.)
Once you have completed this section, click the Save Config button at the top right of the page.
4. Purchase Order
The next payment method that you can configure for your customers to use is Purchase Order. A Purchase Order (PO) allows customers to pay for purchases by referencing a PO number during checkout. Typically, these types of authorized orders are for larger companies or specific customers who have a previously-approved PO with your store. If one of these customers selects PO as their payment method, they will receive your invoice and process payment to your company.
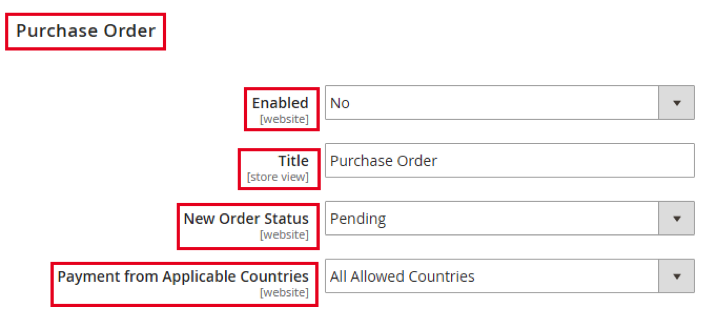
- Enabled: Set to Yes if this payment method is accepted
- Title: The name that will display for this payment method on the Checkout page
- New Order Status: Set this to Pending until payment is authorized
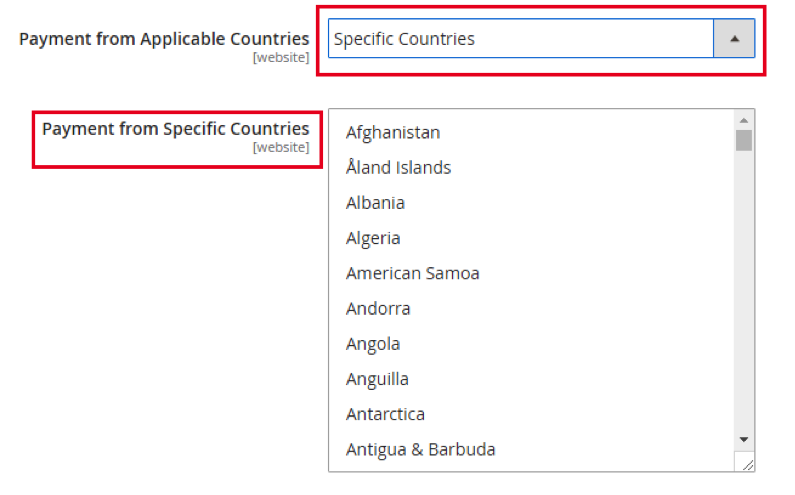
- Payment from Applicable Countries: Choose from one of the drop-down options:
- All Allowed Countries: This will allow customers from all countries selected in your store configuration to use this payment method
- Specific Countries: If this option is chosen, the Payment from Specific Countries list will appear – you can select the specific countries that this payment option will be available for
- Minimum Order Total: Enter the minimum order total that needs to be met for this payment method to qualify for use
- Maximum Order Total: Enter the maximum order total that needs to be met for this payment method to qualify for use
- Sort Order: Enter a number to determine the position of this payment option in the list of payment methods that appear on the Checkout page (ex. 0 = first, 1 = second, etc.)
Once you have completed this section, click the Save Config button at the top right of the page.
5. Zero Subtotal Checkout
The final option you’ll see in the Payment Method section is Zero Subtotal Checkout. This option is only available for orders that are placed within the Admin, not the front end of your site. This can be used for orders that have zero as the subtotal, such as:
- A discount covers the entire purchase price
- A downloadable product with a price of 0.00 is added to the cart
- A coupon code that covers the entire purchase price, including shipping
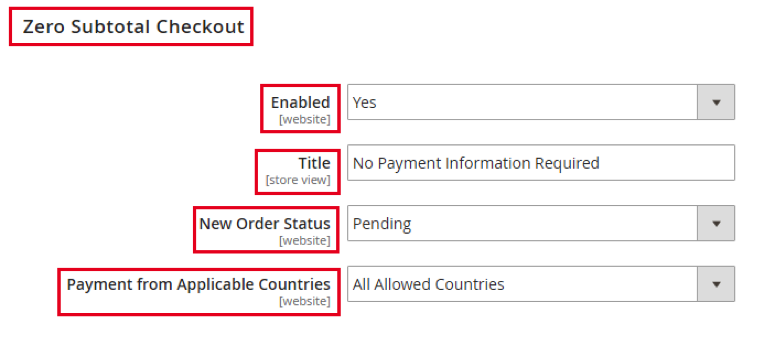
- Enabled: Set to Yes if this payment method is accepted
- Title: The name that will display for this payment method on the Checkout page
- New Order Status: Set this to Pending until payment is authorized
- Processing: Payment has been authorized, a transaction is being processed
- Payment from Applicable Countries: Choose from one of the drop-down options:
- All Allowed Countries: This will allow customers from all countries selected in your store configuration to use this payment method
- Specific Countries: If this option is chosen, the Payment from Specific Countries list will appear – you can select the specific countries that this payment option will be available for
- Sort Order: Enter a number to determine the position of this payment option in the list of payment methods that appear on the Checkout page (ex. 0 = first, 1 = second, etc.)
Once you have completed this section, click the Save Config button at the top right of the page.
In Closing
Without using any third parties or services, you can configure your Magento 2 site to accept different payment methods from your customers. These methods are simple to configure and test to ensure that your customers have the options you’d like to offer.
If you have any questions or comments about setting up payment methods, or other administrative settings in Magento 2, we’re here to help! Fill out our contact form today to connect with us, or reach out via our live chat – let us know what your goals are and how we can help you achieve eCommerce success!