In this article, we will walk through the most important details for creating product attributes in Magento 2 including:
- What are Product Attributes?
- Creating Product Attributes
- Creating Product Attributes: From the Product Attribute Page
- Creating Product Attributes: From the Product Management Page
- Adding Product Attributes to Attribute Sets
What are Product Attributes
Product attributes can be viewed as product characteristics. Attributes are used to provide additional information on your product pages, they can be used in promotional rule parameters, layered navigation criteria, search parameters, product comparison criteria, reports, filtering, and sorting. These attributes can be helpful for a merchant’s management and organization of their products.
There is no limitation to the number of attributes and attribute sets that can be created. However, planning your attributes and attributes sets in advance would be one of the suggested phases for product and site architecture for your store, especially since Magento 2 allows product attribute creation “on the fly” while creating or editing a product. We will talk more about this in the Adding Product Attributes to Attribute Sets section.
Magento, by default, comes with a few attributes such as Name, Price, Description, etc. These attributes are built into the Magento 2 core platform and are referred to as “System Attributes”.
There are two ways of creating product attributes – from the product attribute page, and from the product editing page.
Creating Product Attributes
From the Product Attribute Page
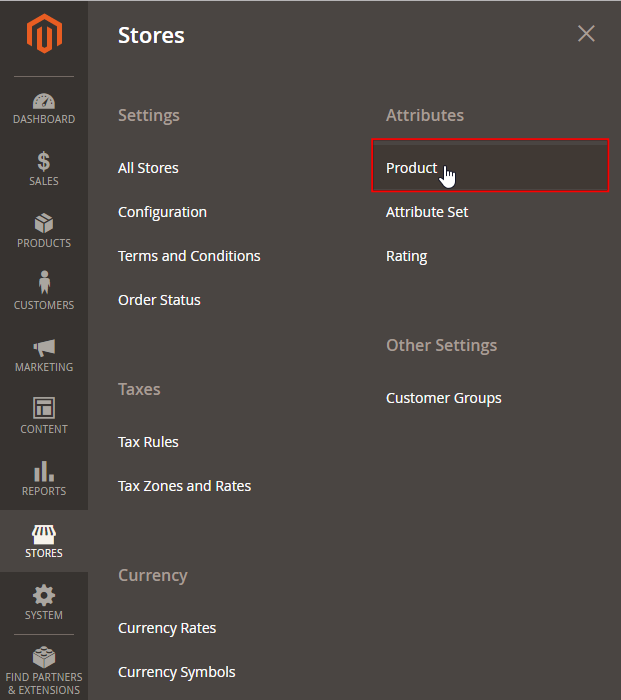
In your Magento admin navigate to Stores > Attributes > Product:
This will open a list of currently available product attributes. If you did not yet add your own custom attributes, this table will present the list of pre-set default Magento System Product Attributes.
To easily navigate this table, you can also find the desired attributes by using Magento’s table filters:

To add a new attribute, click on the “Add New Attribute” button:
![]()
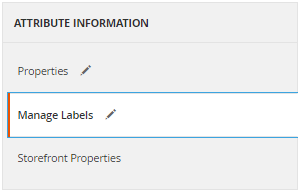
You will find that the page for attribute creation is separated into 3 sections on your left-hand side of the page. Select “Properties”. This tab will allow you to configure the fields necessary to create the attribute. It contains your attribute’s name and appearance as well as whether this attribute will be allowed to create configurable products by. Your first step is to define your Attribute Properties and Advanced Attribute.
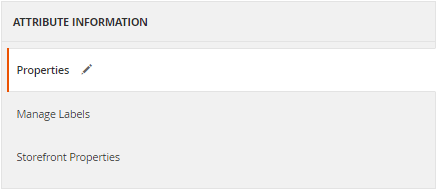
Section 1: Properties
- Default Label – Acts as your new attribute’s name and allows easy identification of the attribute.
- Catalog Input Type for Store Owner – You can select the type of input control which will be used for data entry such as a text field, dropdown, multi-select, etc. If you are creating an attribute for the configuration of configurable products, you would want to make sure you pick dropdown, Color swatch or text swatch, which are the only input types supported for this product type to allow selectable configuration options. These configurable products can still use any of the other attribute types for more descriptive product pages.
Here are the available input types:- Text Field – Single line text attribute – this attribute type does not interact with users. An example attribute would be your Product Name.
- Text Area – Multiple line text area, which allows the use of Magento’s WYSIWYG for text formatting. Example attributes would be your product Description and Short Description.
- Date – Can be made available by drop-down or a pop-up calendar. Example attributes would be News from Date, News to Date and Special price.
- Yes/No – Displays a Yes/No drop-down
- Dropdown – Displays a drop-down list configured by the merchant. Example attributes would be Color, Manufacturer, Brand, Size – Can be used for configurable products set up.
- Multiple Select – Displays a list of values which allows selection of more than one option.
- Price – Used to display price fields for your products while the currency is determined in the System Configuration page. Example attributes would be Price, Special Price, Tier Price, Cost, MSRP, etc.
- Media Image – Displays additional product image types. Example attributes would be Base Image, Small Image, Thumbnail Image, additional infographic/instructions/logo image types can be added.
- Fixed Product Tax – Defines a fixed product tax at the item/product level which you can set based on your local requirements.
- Visual Swatch – Displays an image swatch which can be used for color, texture and other visual configurations – Can be used for configurable products set up.
- Text Swatch – Displays a text based swatch which can be used for size and dimension configuration – Can be used for configurable products set up.
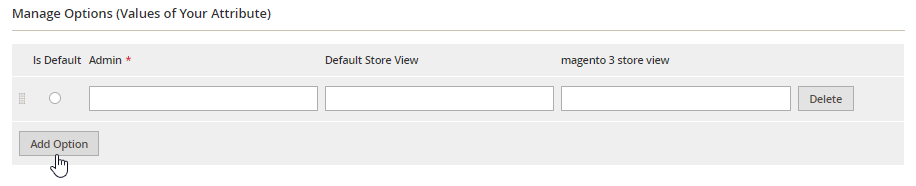
- Manage Options (Values of Your Attribute) – This part appears if you selected for your input type one of the following options: Multi-select, Dropdown, Visual Swatch and Text Swatch.

Upon click on “Add Option” a new row will be added and you will now be able to add your first value
Each of this form’s fields refers to a specific store view. Therefore, if you have more than one, you will need to update the name of the value on all active store views like in the example below.
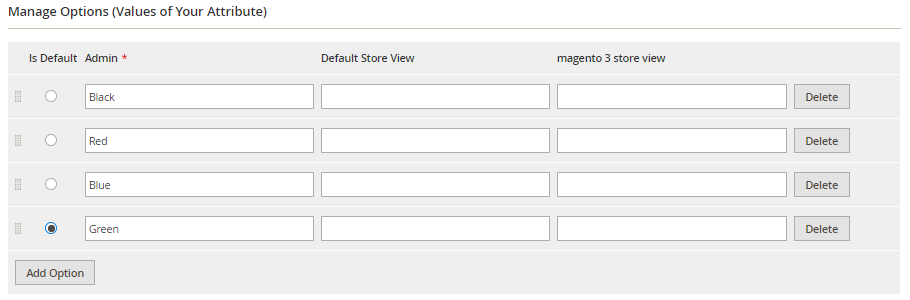
You will notice that the “Is Default” radio button is checked for the last option. Which means that any product that this attribute is relevant to and has the value of “Green” will, by default, load “Green” as the set value selection for that product. However, A default value cannot be set for Multiple Select or Fixed Product Tax input types, and would only work with the swatch options.
- Values Required – Determines if this current attribute is a required quality for your products to be defined by. You can decide to require your product colors be specified, their size, curve or any other attribute specific to your business and line of products. This would require you to specify the value of this attribute while creating your products.
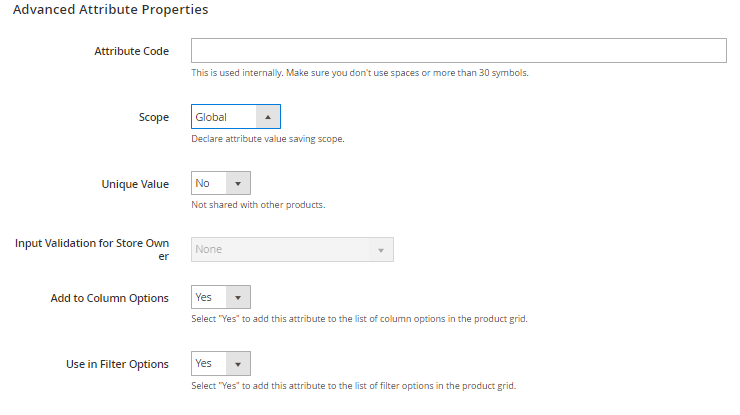
- Attribute Code – This value is used internally within your Magento store and once saved, it cannot be changed. The recommended and common use is repeating the name of the attribute, to easily identify your attributes when looking at a CSV file. Make sure to only use lowercase letters and no spaces or special characters, as this code is used while Magento programmatically indexes your site, and handles a batch product creation via CSV files.
- Scope – This identifies the attribute’s application level and can be set to Store View, Website, or Global. Note – If you are creating an attribute for configurable products, make sure to set the scope to Global.
- Unique Value – This determines if your attribute should have a unique value per each time this attribute is used within it’s set scope – For example: let’s say this current attribute is for products with unique CPU in addition to their SKU. However, I do sell the same products with the same SKU’s over 2 store views and only my French store would require CPU. My CPU product attribute will be set to the Scope of only my French Store View and have a unique value. Another example would be the SKU attribute which is set to Global Scope with Unique Values.
- Input Validation for Store Owner – This validates the attribute value entered and can check for Decimal Numbers, Integer Numbers, Emails, URL’s, Letters (a-z, A-Z), or Numbers (0-9). This will not apply to any selectable attribute types like dropdown, multi-select, etc.
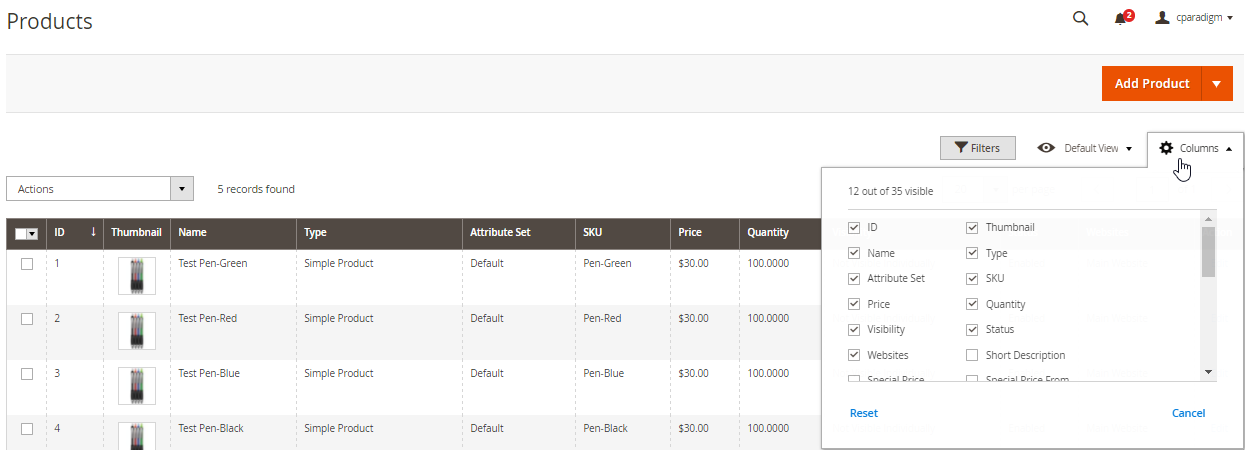
- Add to Column Options – This will add the new attribute to the Catalog Product Management column area, in case you need to add it to your quick view of your catalog:
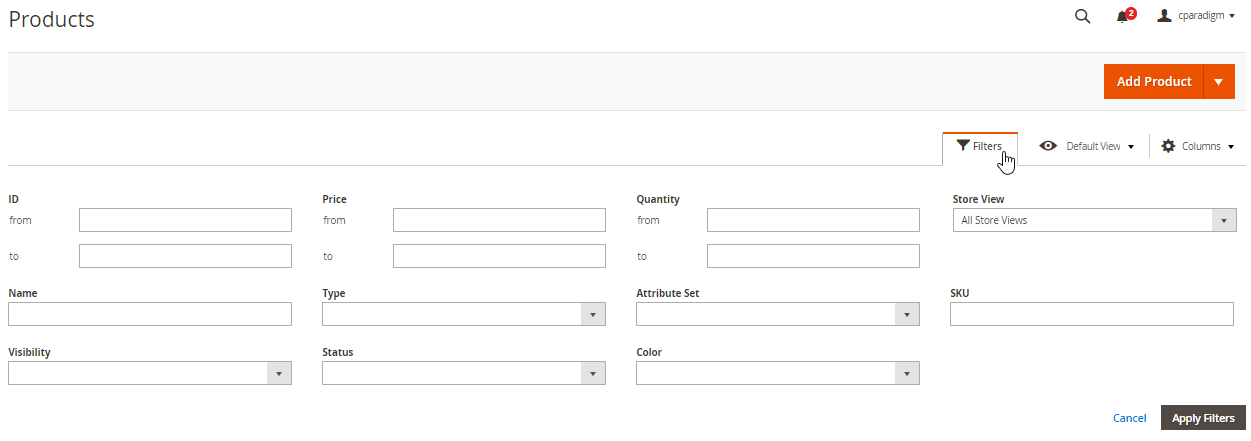
- Use in Filter Options – This adds the new attribute to the filter control panel above your Catalog Product Management page:
Section 2: Manage Labels
After you have completed the “Properties” section you will navigate to the “Manage Labels” tab.
Here you will enter the title label for your attribute. If you have more than one store view, enter the value for the attribute label or label translations on all relevant store views.

Section 3: Storefront Properties
After you have completed the “Manage Labels” section, navigate to the “Storefront Properties” tab.
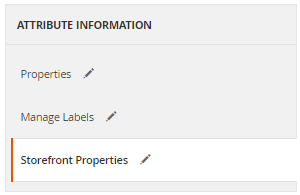
This tab allows you to configure the attribute’s behavior and use in the frontend of your store. Most configurations in this tab are simple yes/no selections which would also depend on your store’s design and theme in use.
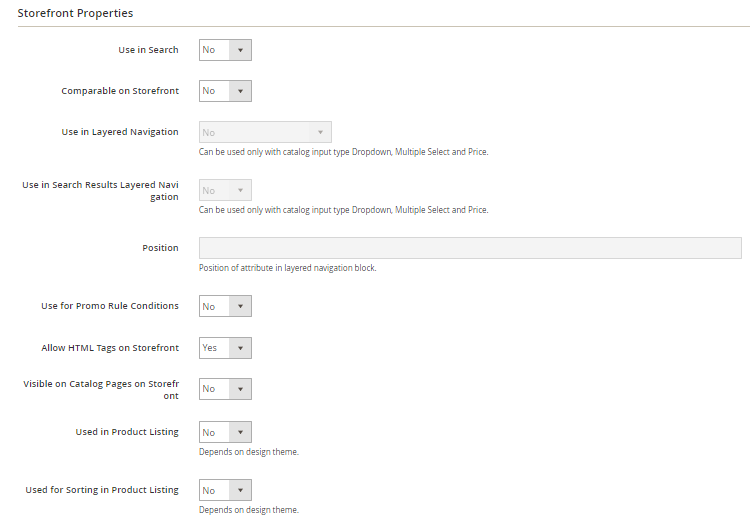
- Use in search – Determines if this attribute will be available for search. When set to “Yes” the following additional settings appear:
- Search Weight – Set the search weight from 1-10. The greater search weights are being returned as search results before the lighter weight search terms.
- Visible in Advanced Search – When enabled, this adds the attribute to the advanced search form
- Comparable on Storefront – Allows the frontend user to compare products by the current attribute
- Use in Layered Navigation – If your site is using layered navigation, this setting will add the new attribute to the side bar layered navigation on your category pages. Note that this setting can only be used with the Multiselect, Dropdown and Price type attributes. To enable this, you will determine the behavior of this attribute in the layered navigation.
- Filterable (with results) – the attribute will only appear in the layered navigation if there are any products it applies to in the current category.
- Filterable (no results) – the attribute will always appear in the layered navigation, even when there are no products with values applied for that attribute.
- Use in Search Results Layered Navigation – Like the layered navigation, this setting controls the search result page’s layered navigation. Note that this setting too can only be used with the Multiselect, Dropdown and Price type attributes.
- Position – This is a numeral value setting which is available when setting an attribute to be filterable and used in layered navigation. This setting sorts the order of attribute appearance in the layered navigation.
- Use for Promo Rule Conditions – Enabled, this allows the attribute to be available to use for promotion price rules conditions.
- Allow HTML Tags on Storefront – When enabled this allows the text to be formatted with HTML. This setting also controls the WYSIWYG for the Text Area attribute type.
- Visible on Catalog Pages on Storefront – When enabled, this adds the attribute to the product page additional information and description tabs. Depends on the theme.
- Used in Product Listing – This will add the attribute values to the product summary in product listing pages. Depends on the theme.
- Used for Sorting in Product Listing – This will add the attribute values to the “Sort By” functionality in product listing pages. Depends on the theme.When done configuring your attribute and its behavior, don’t forget to save3 it and add to an attribute set for it to show up on your product pages.
From the Product Management Page
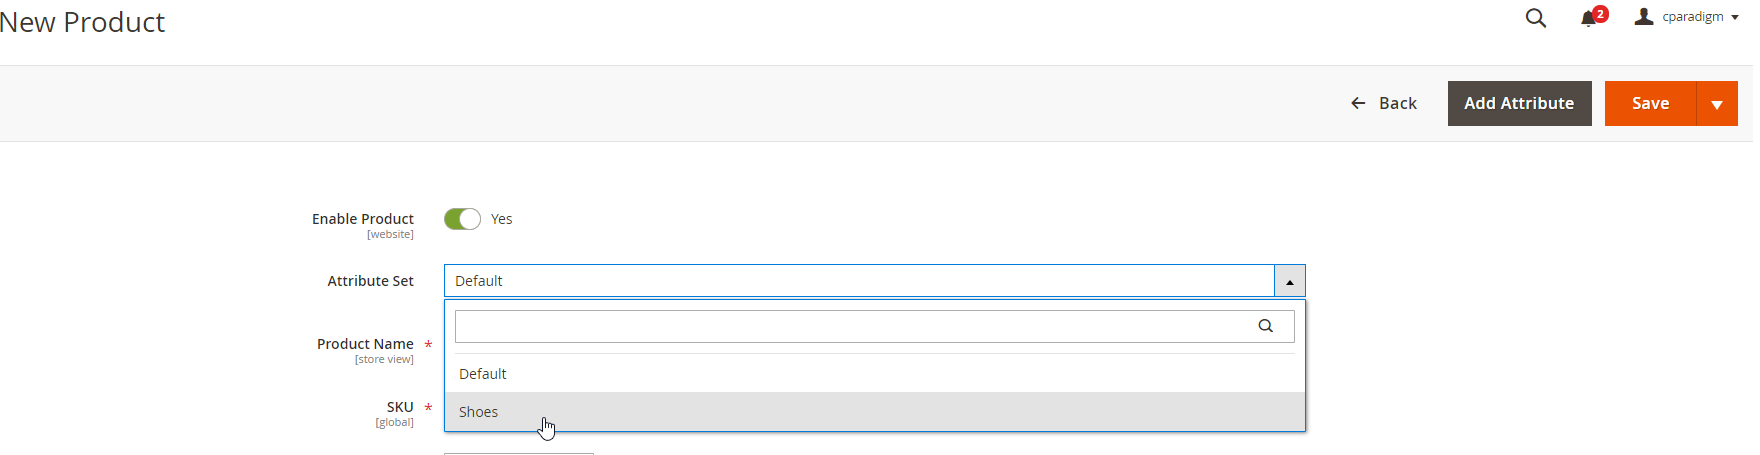
As part of the new Magento 2 streamlining of product creation, Magento 2 allows attribute creation upon product creation. When creating a new product, there is a new “Add Attribute” button next to the Save button.

Upon click, this will open a side tab with a listing of all your available attributes that are already created on your site and were not added to the current attribute set.
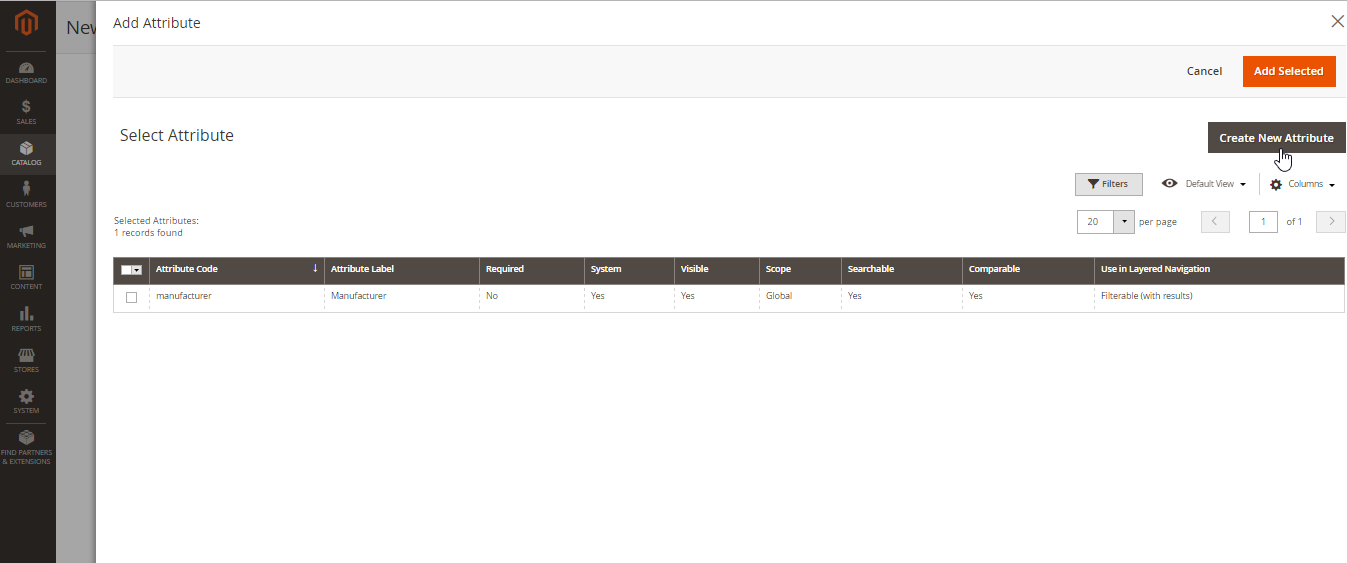
You can now click on “Create New Attribute”, and an additional tab will open for you to create a new attribute.
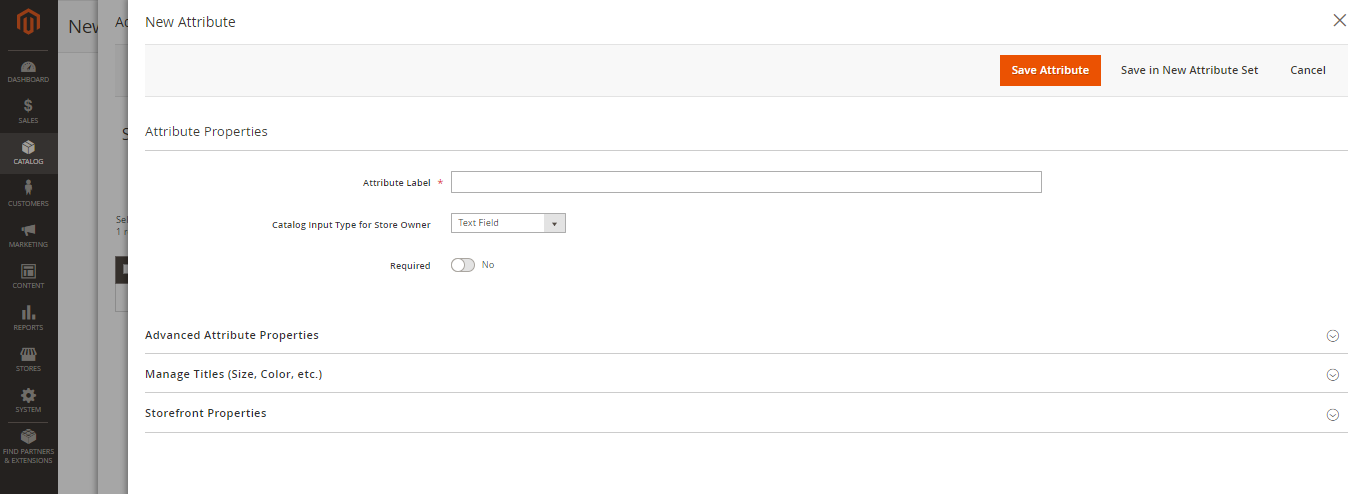
Here you will find all the same attribute setup fields for an attribute creation as specified above. Remember to save your attribute!
Adding Product Attributes to Attribute Sets
Once you have all your new attributes created, the last thing you will need to do for them to be available for set up on the backend, and viewing on the frontend when relevant, is to add them to your attribute sets. Attribute sets are attribute lists that are being loaded into your product creation page.
This step is not a requirement in Magento 2, however, would help streamline your process of product creation and management, once you do have the attributes in sets. Attributes sets can also allow a faster setup of products. For example – We could have the default attribute set that is for general items and would load all products attributes, and we can also load a product specific attribute set for downloadable products, or shoes and that way when creating a shoe product we can load that specific attribute set and load a different list of attributes that would apply to it.
To add the new attribute to your attribute sets, navigate to Stores > Attributes > Attribute Sets
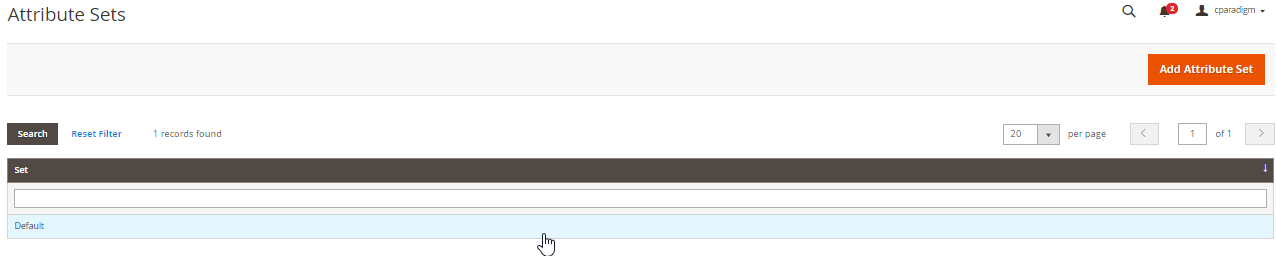
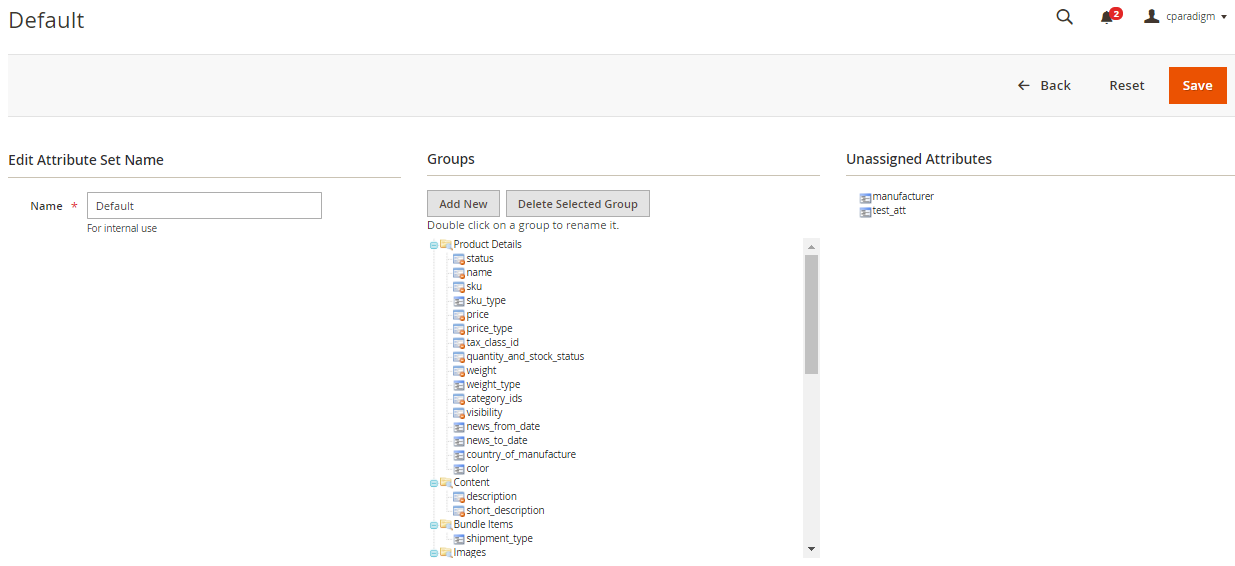
You will find a list of all your attribute sets, in this case we only have Default. You will now find a list of attributes included in the current attribute set, and attributes which are not yet included.
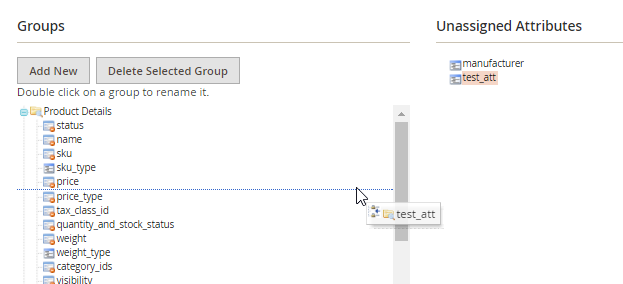
You can now drag your new attribute to anywhere in this list and drop it there. The location in which you drop the attribute is where in your product management page this new attribute will appear.
Recap
You should now know how to create and manage your product attributes in Magento 2. You should now know all the possible product attribute settings and be able to properly set up product attribute behavior, appearance and search ability for your users to find your site as informative as possible. Contact us for consultation, database architecture and planning for your site!